
Appearance
Create a verification
This article covers: New Verification.
Before you start
- Access. You need access to Recruitment > Background Verification. If you do not see it in the menu, ask your administrator for the role that covers this area.
Steps
Open Recruitment > Background Verification.
Select New Verification.
In the window New Background Verification fill in the fields below.
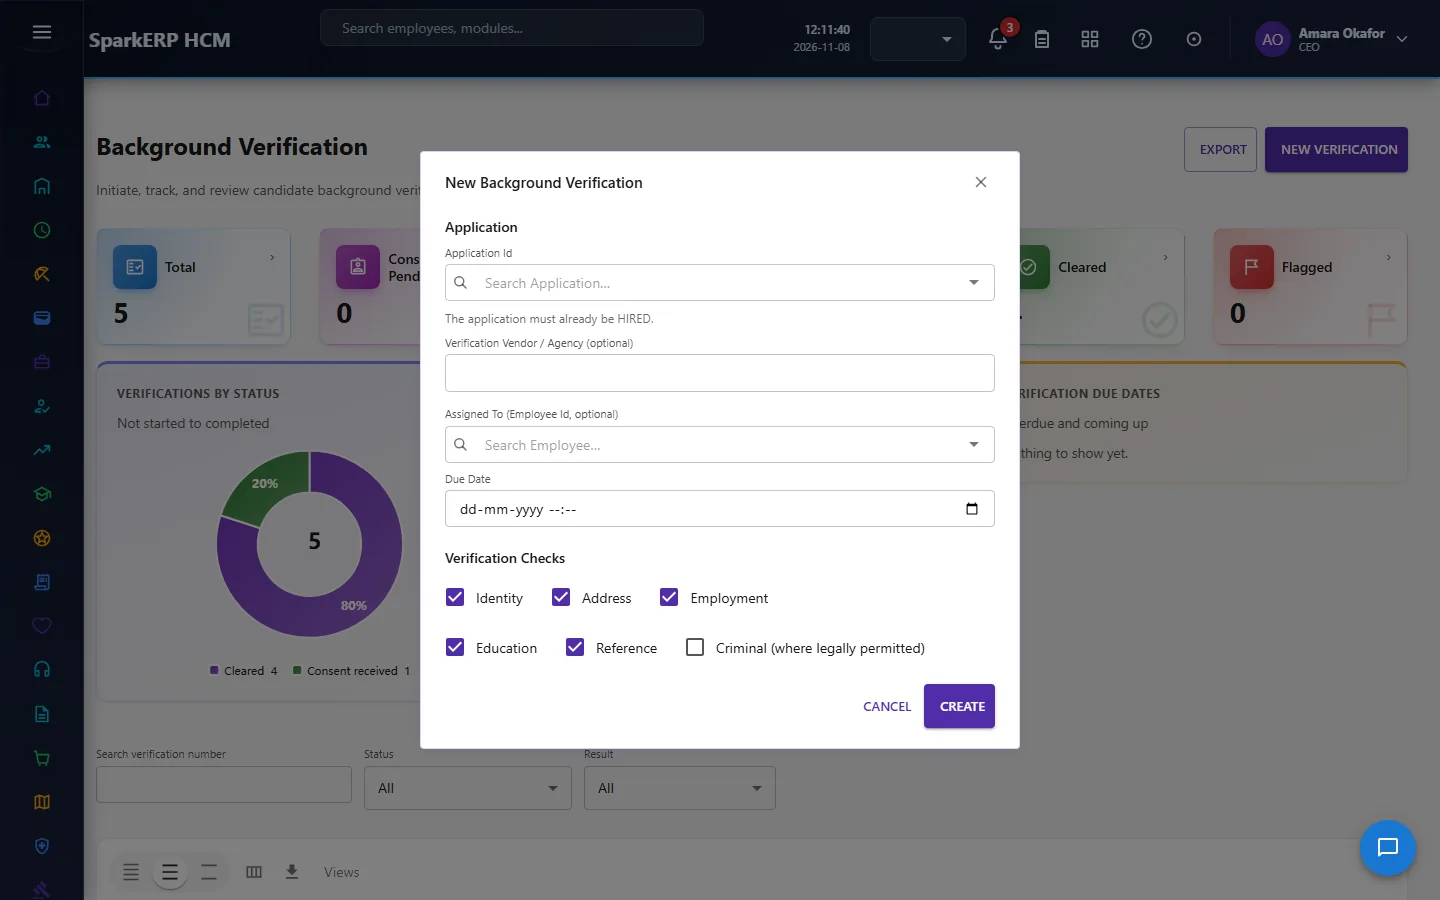
| Field | What it means and what to enter |
|---|---|
| Verification Vendor / Agency (optional) | Type the verification vendor / agency (optional). |
| Identity | Tick or untick. |
| Address | Part of the postal address. |
| Employment | Tick or untick. |
| Education | Tick or untick. |
| Reference | Tick or untick. |
| Criminal (where legally permitted) | Tick or untick. |
- Select Create.
The window closes and the table shows the result.
If something does not work
- The button "New Verification" is missing. You do not have the permission, or the page is not in your menu. See Access above.
- A list in the window is empty. The records it picks from do not exist yet.
- The window will not close or shows a message. Read the message: it names the field that is missing or not allowed.