
Appearance
Onboard your organization: step by step
This guide takes a new organization from nothing to people signing in and working. Follow the chapters in order; each one says where to click, what to type and what you should see. Before chapter 4, read Understand your organization structure: it explains the decisions the setup asks you to make. Allow about half a day for the first pass. A company with a few hundred people usually needs another day to load employees and check leave and payroll.
Before you start
You need:
- a computer with a current browser (Chrome, Edge, Firefox or Safari). Phones work for daily use; do the setup on a computer;
- the company name, an email address that will belong to the owner of the account, and a mobile number;
- a list of your legal entities (the companies that employ people), your locations, your departments and your job titles. A spreadsheet is enough.
Who does what: the person who registers becomes the Tenant Owner. Only the Tenant Owner and the administrators they create can set things up. Your software vendor sets your licence (edition and term); you cannot change it.
Chapter 1. Register the organization
Open the sign-in page and select Create a free account.

Step 1, Account. Fill in:
Field What to enter Company name The name of your company, for example Acme Industries. Email address The owner's email. It is also the sign-in name. Mobile number With the country code, for example +911234567890. Password At least 8 characters with an uppercase letter, a lowercase letter, a number and a special character. The strength bar and the five ticks under the box show what is still missing. Confirm password The same password again. "Passwords match" appears in green when they do. 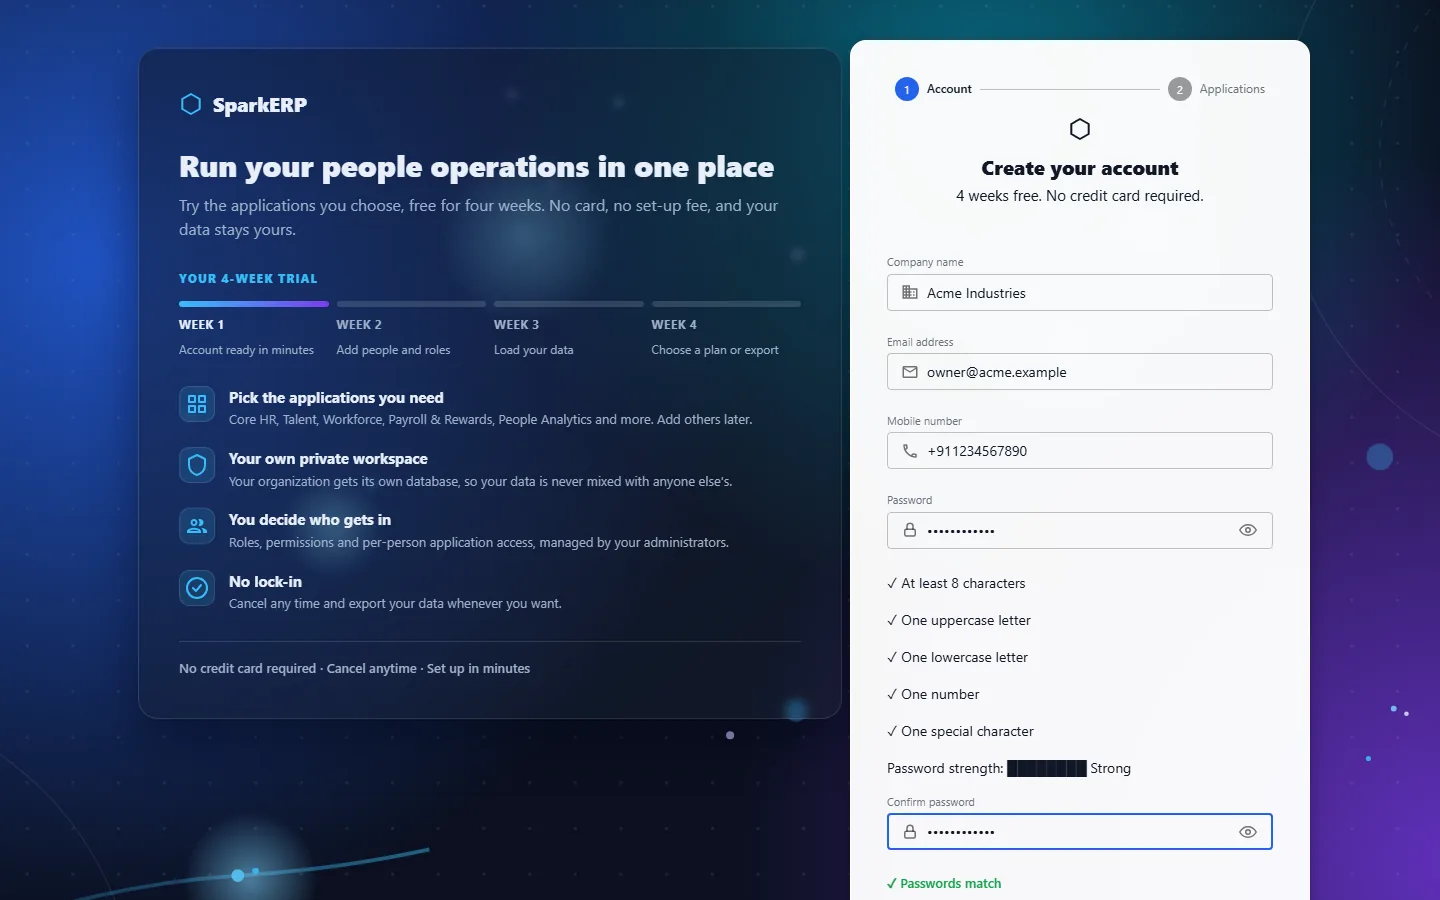
Select Continue. Nothing is created yet.
Step 2, Applications. Tick the applications you want to try. Core HR is always included. You can add the others later.
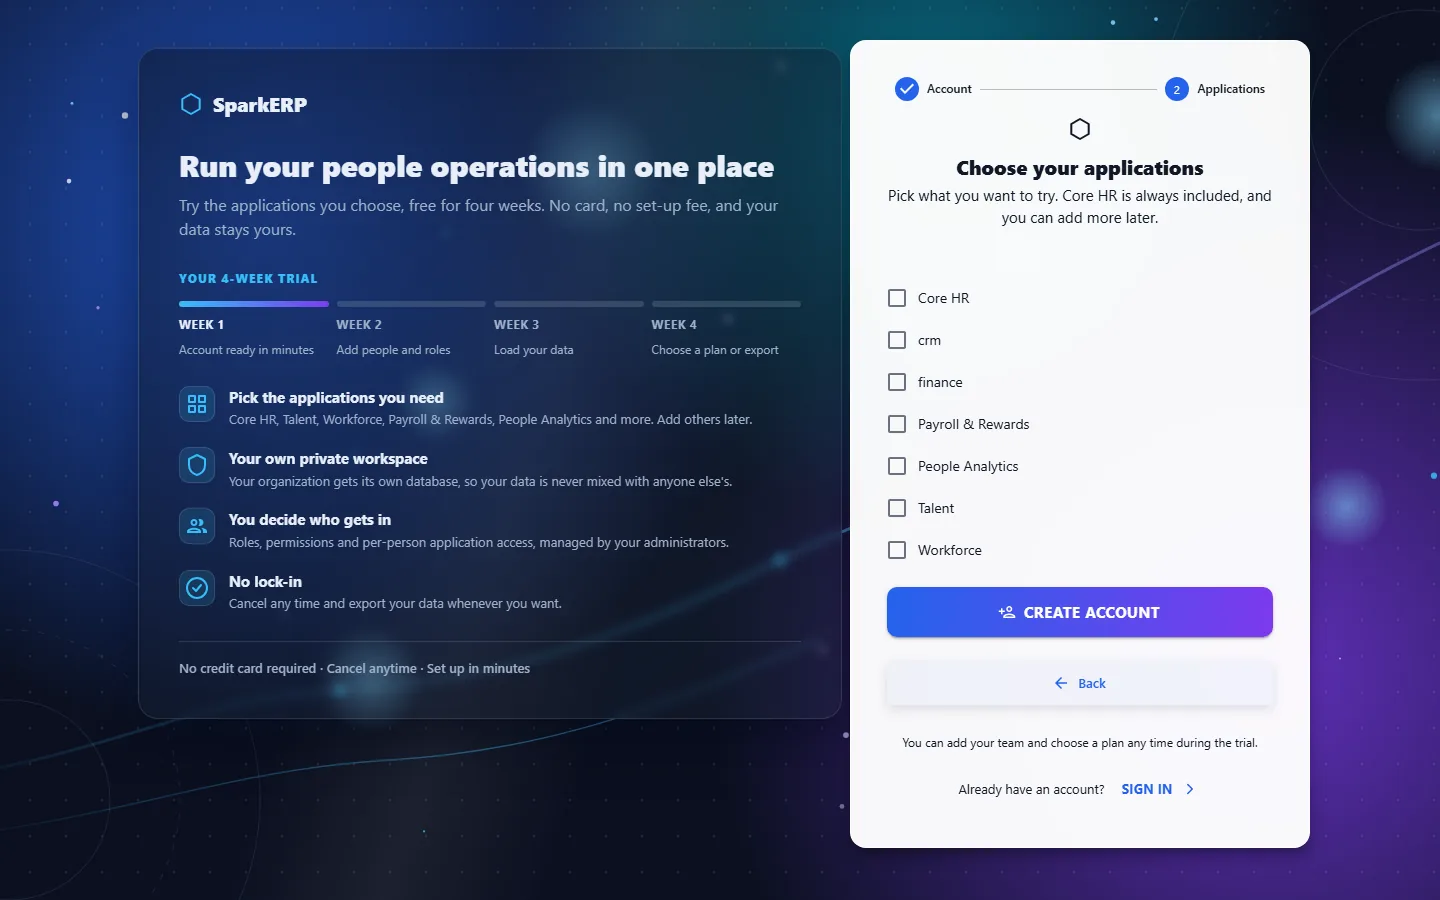
Select Create account. In one step the platform creates your private workspace, your administrator account with the Tenant Owner role, the standard administrator roles, and installs the applications you ticked. A four-week free trial starts; no card is needed.
If Create account reports a problem, read the message under the button. The usual causes are a password that misses a rule, an email that is already registered, or a mobile number without its country code.
Chapter 2. Sign in and find your way around
Sign in with the email and password you registered with.
You land on My ERP, the application launcher. It shows one tile for each application your organization is licensed for: Core HR, Talent, Workforce, Payroll & Rewards and People Analytics (and any others you ticked).
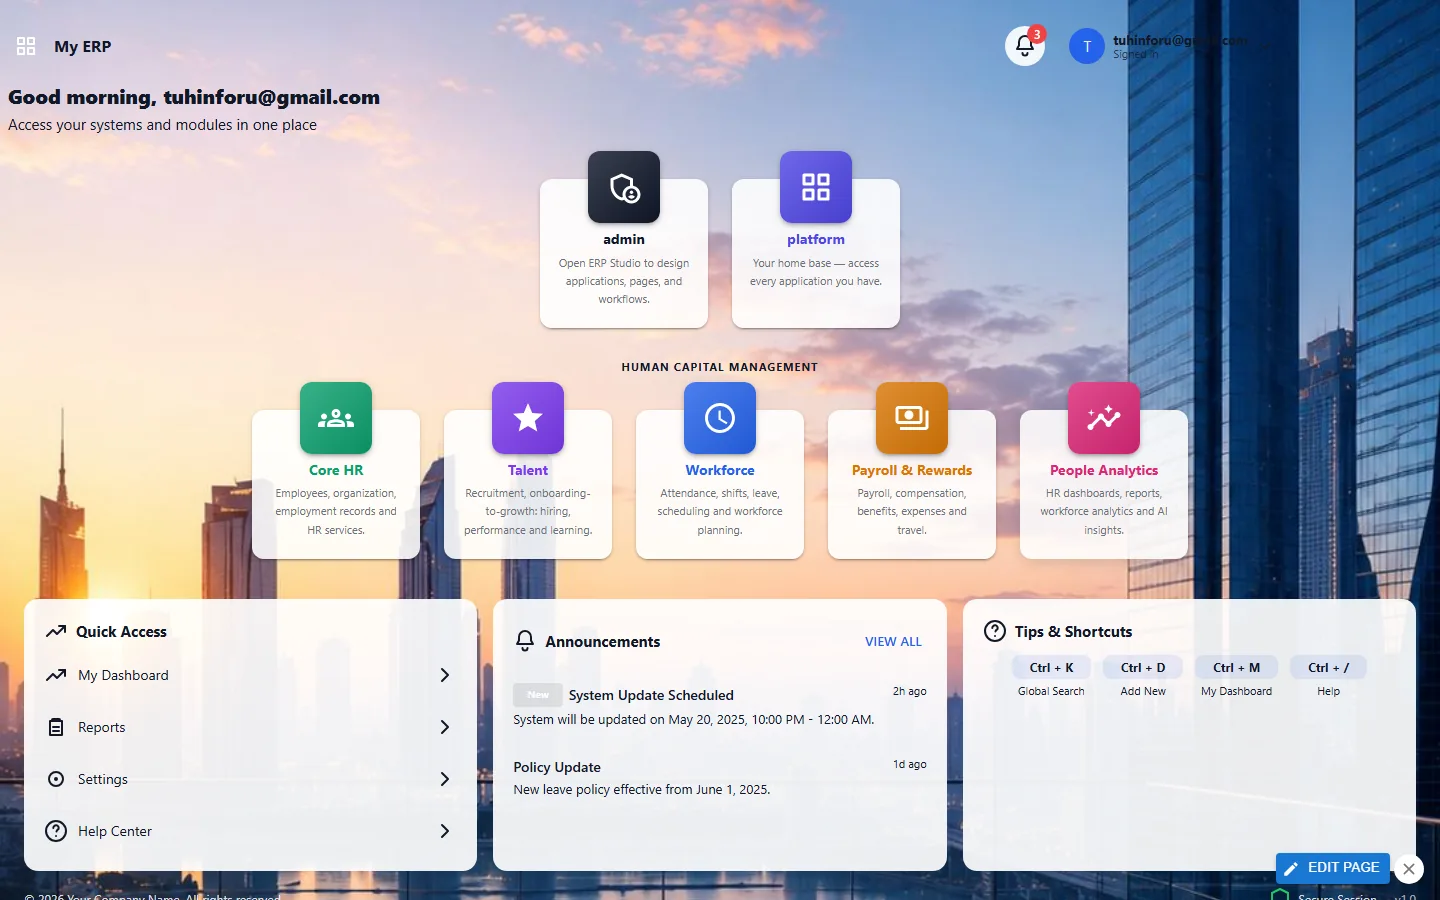
Select Core HR. The left menu groups everything: Employees, Departments, Designations, Locations, and so on. The next chapters use the menu paths exactly as they appear there.
Your name and job title are at the top right. Open that menu for My Profile, My Preferences and Sign out.
Chapter 3. Check your licence
Open the launcher and look at the tiles: you see only the applications your licence includes. Your trial ends 28 days after you registered. Before then, contact your vendor to choose an edition; after the end date people can no longer work. See How licensing works.
Chapter 4. Company details and numbering
Tell HCM who the organization is and how records are numbered, before anyone is added.
General settings
Open HCM Settings > General Settings.
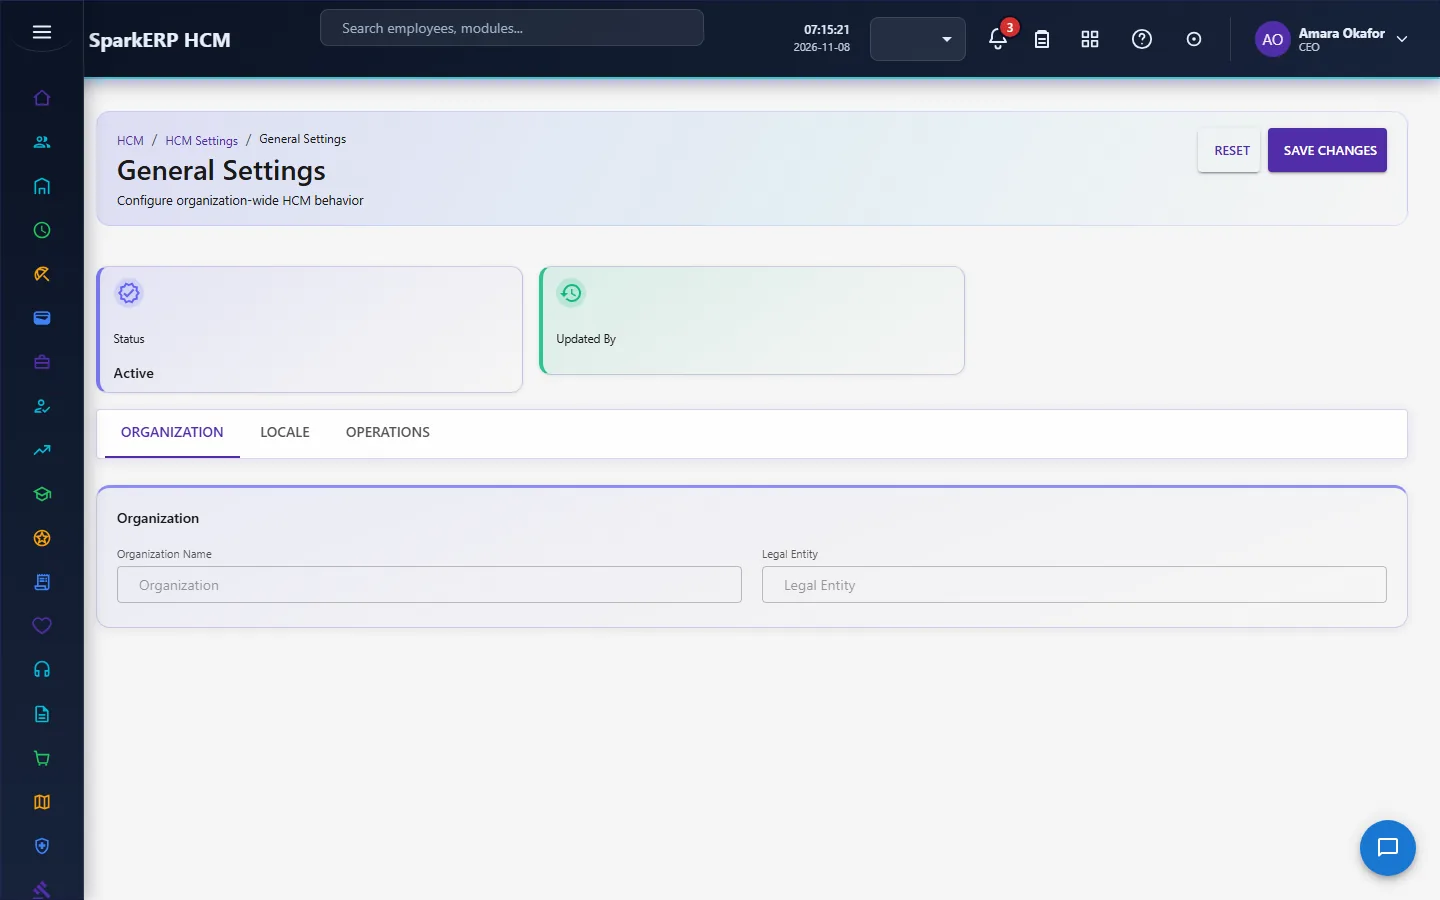
This page is one form. Fill in or change:
| Field | What to enter |
|---|---|
| Organization Name | Type it (for example: Organization). |
| Legal Entity | Type it. |
| Timezone | Choose one: Africa/Abidjan, Africa/Accra, Africa/Addis Ababa, Africa/Algiers, Africa/Asmara, Africa/Asmera, Africa/Bamako, Africa/Bangui, Africa/Banjul, Africa/Bissau... |
| Date Format | Choose one: DD/MM/YYYY, MM/DD/YYYY, YYYY-MM-DD, DD-MMM-YYYY |
| Currency | Choose from the list. |
| Financial Year Start | Type it. |
| Payroll Frequency | Choose one: Weekly, Bi-Weekly, Monthly, Custom |
Then select Save Changes.
Organization settings
Open HCM Settings > Organization Settings.
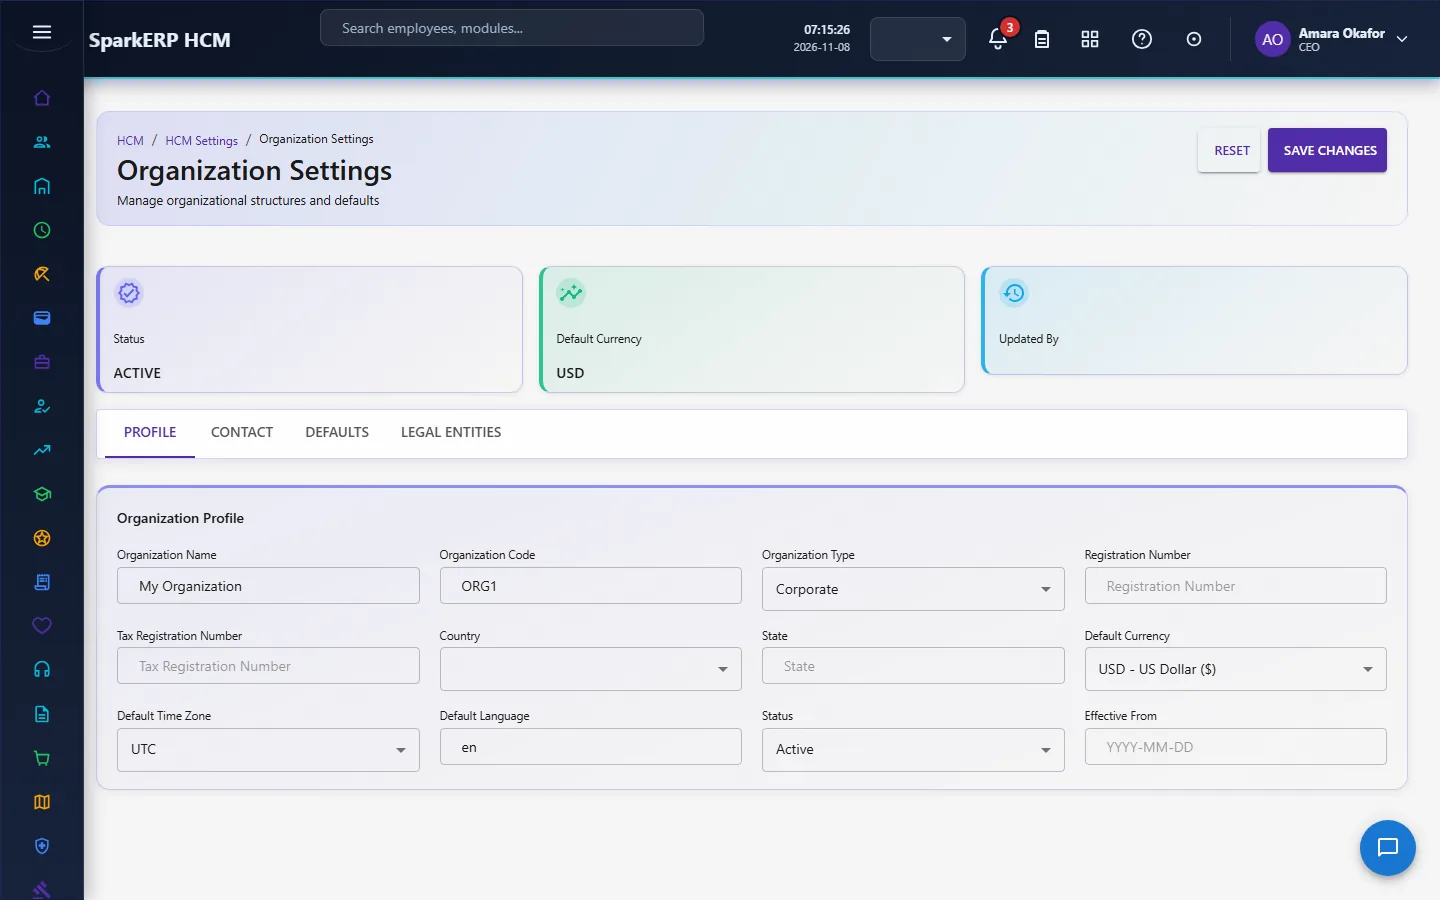
To add a record, select Add Legal Entity. In the window Legal Entity fill in (a star after a name means the screen requires it):
| Field | What to enter |
|---|---|
| Legal Entity Name | Type it. |
| Legal Entity Code | Type it. |
| Registration number | Type it (for example: Company registration number). |
| Tax number | Type it (for example: Tax identification number). |
| Currency | Type it (for example: Currency code, for example USD). |
| Time zone | Type it (for example: IANA time zone, for example Europe/London). |
| Country | Choose from the list. |
| Status | Choose one: Active, Inactive |
Then select Save Changes. The window closes and the table shows the record.
The table shows: Name, Code, Country, Status, Actions.
Numbering sequences (employee numbers and other record numbers)
Open HCM Settings > Numbering & Sequences.
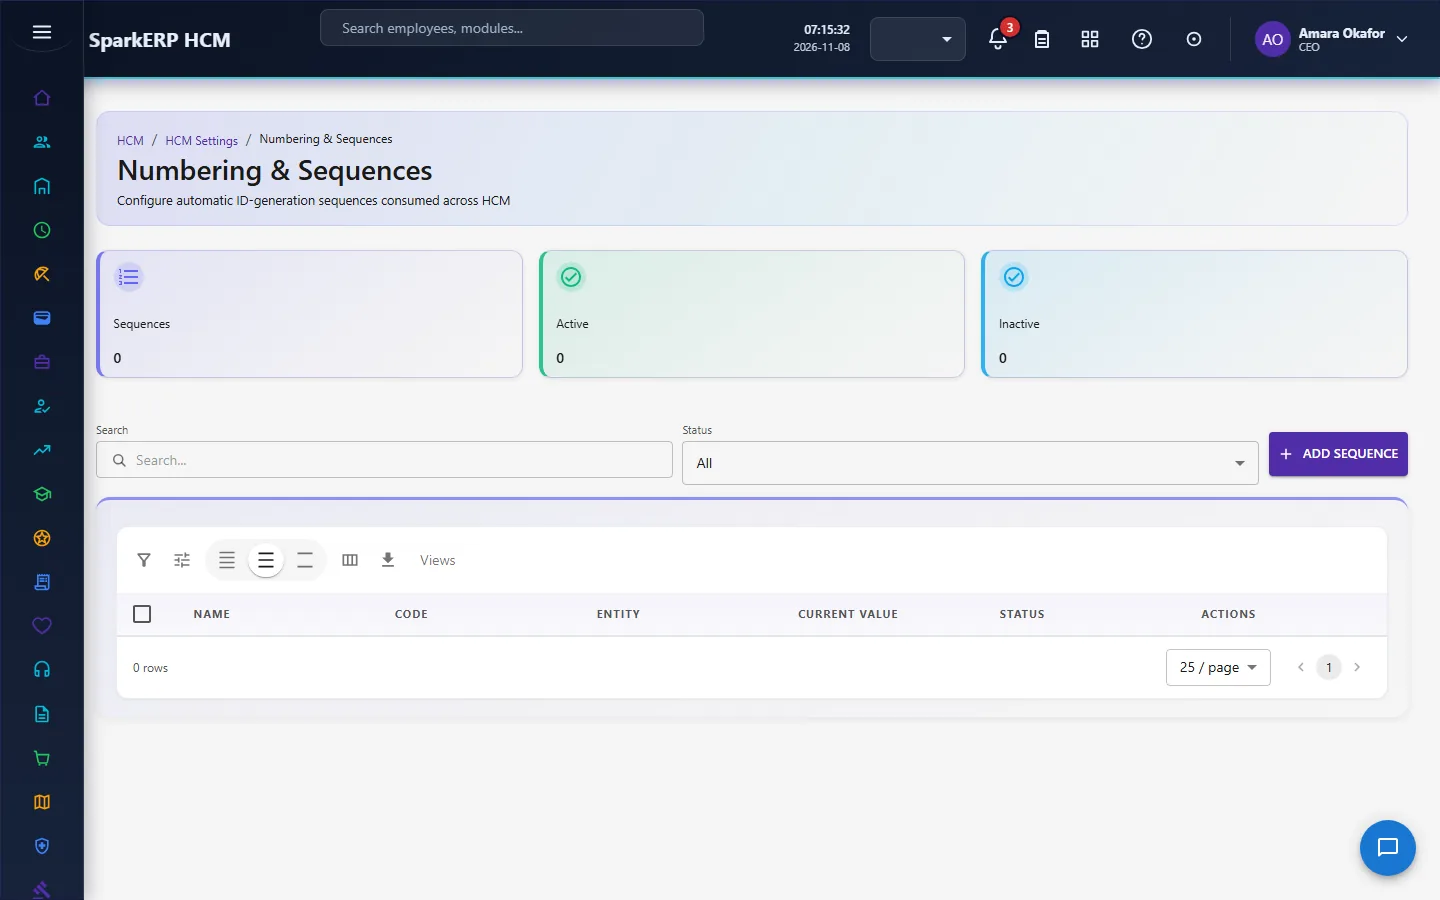
To add a record, select Add Sequence. In the window Numbering Sequence fill in (a star after a name means the screen requires it):
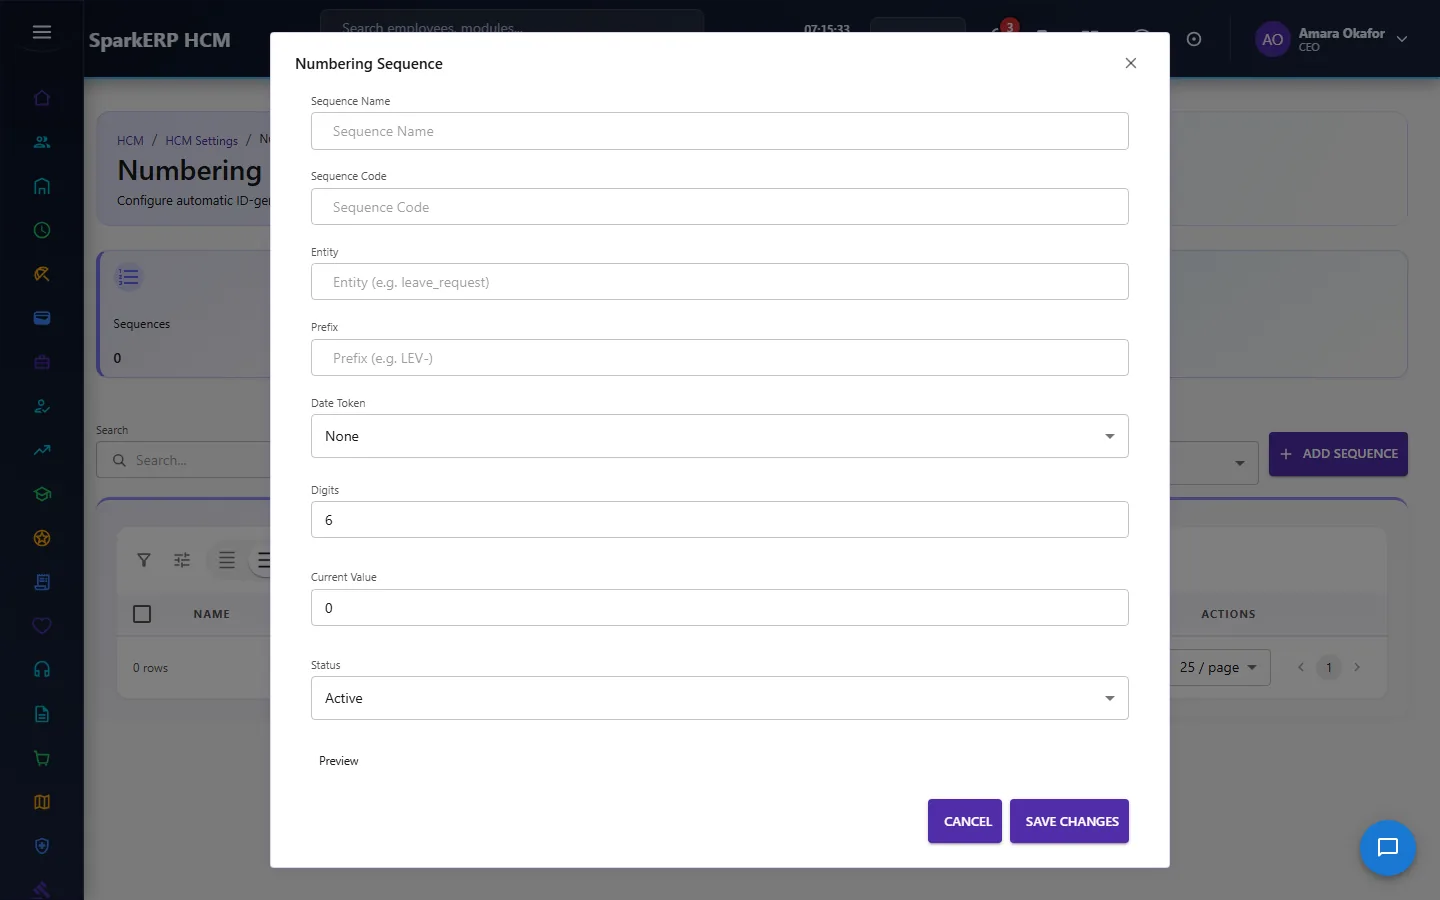
| Field | What to enter |
|---|---|
| Sequence Name | Type it. |
| Sequence Code | Type it. |
| Entity | Type it (for example: Entity (e.g. leave_request)). |
| Prefix | Type it (for example: Prefix (e.g. LEV-)). |
| Date Token | Choose one: None, YYYY, YY, YYYYMM, Financial Year |
| Digits | Type it. |
| Current Value | Type it. |
| Status | Choose one: Active, Inactive |
Then select Save Changes. The window closes and the table shows the record.
The table shows: Name, Code, Entity, Current Value, Status, Actions.
Chapter 5. Legal entities and locations
The companies that employ people and the places they work. Create these first: employees, payroll and statutory rules attach to them.
Legal entities
Open Organization > Legal Entities.
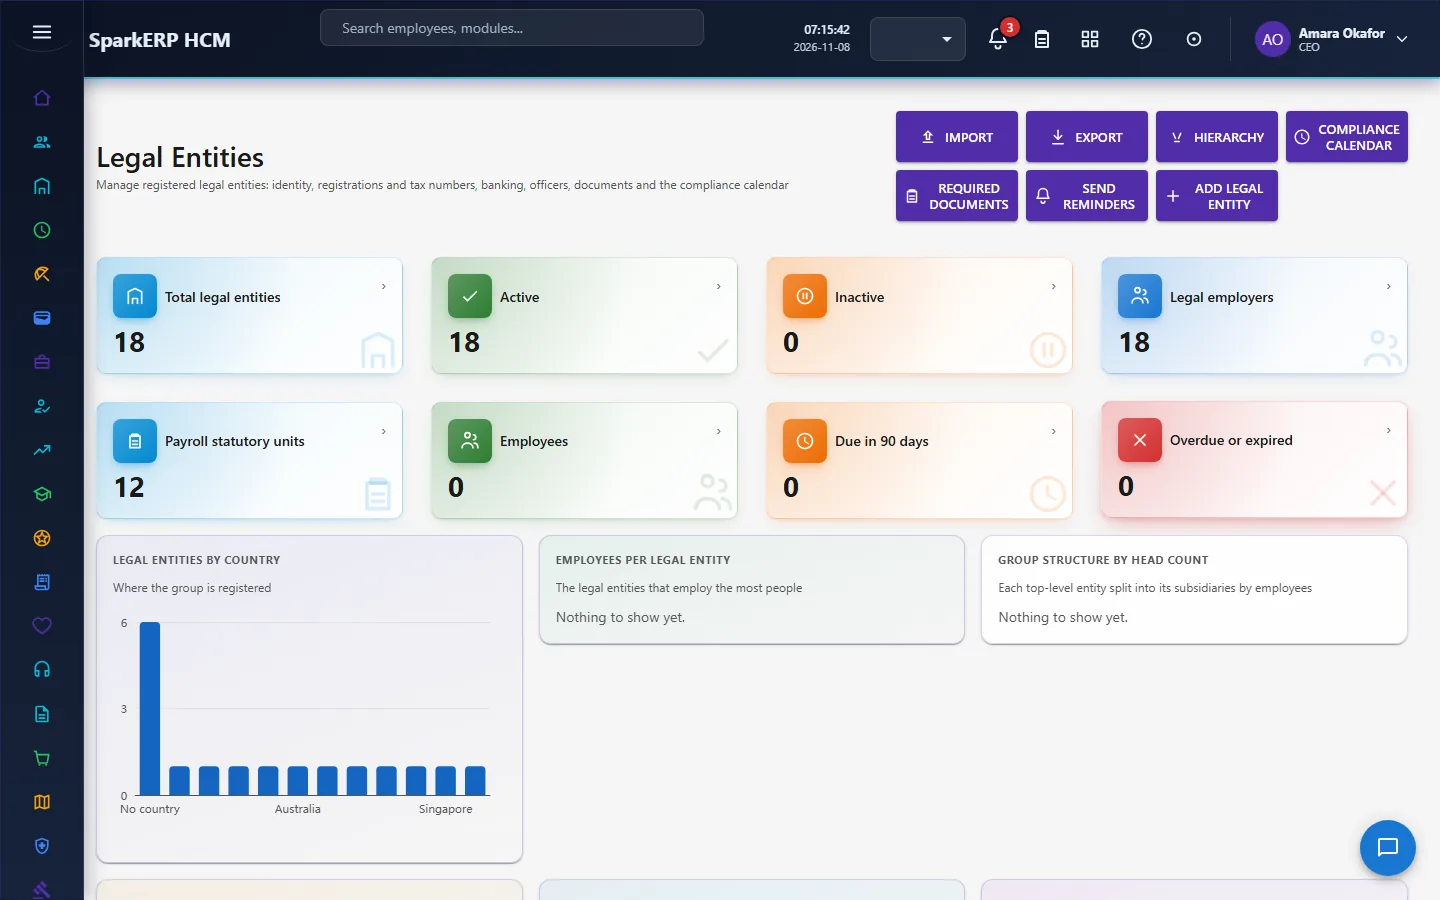
To add a record, select Add legal entity. In the window Legal entity fill in (a star after a name means the screen requires it):
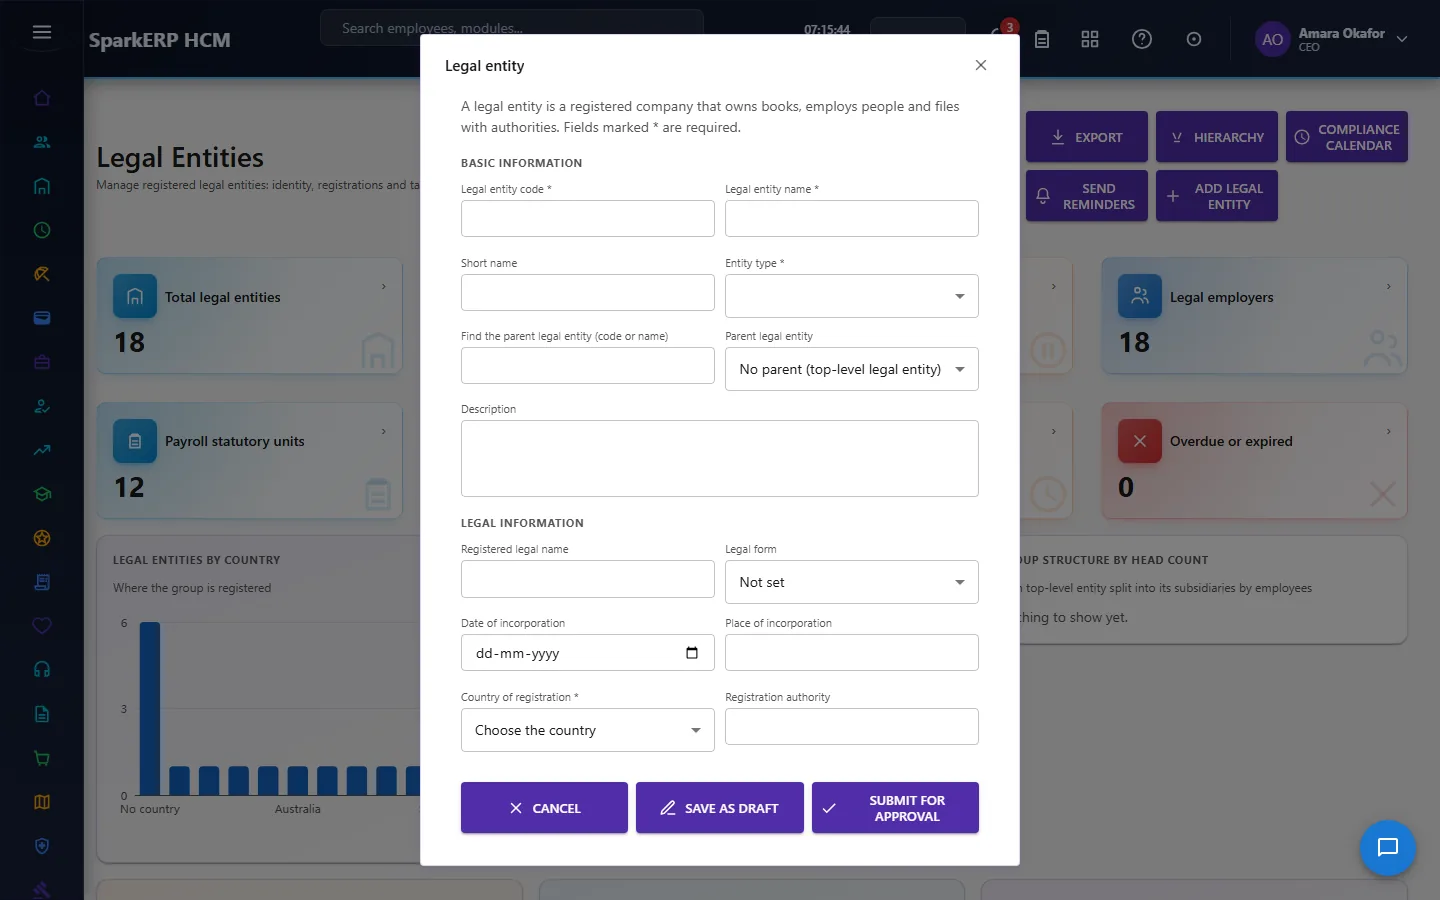
| Field | What to enter |
|---|---|
| Legal entity code * | Type it. |
| Legal entity name * | Type it. |
| Short name | Type it. |
| Entity type * | Choose from the list. |
| Find the parent legal entity (code or name) | Optional: type part of a name or code to narrow the list below it. |
| Parent legal entity | Choose from the list. |
| Description | Type it. |
| Registered legal name | Type it. |
| Legal form | Choose one: Not set, Private limited, Public limited, Partnership, LLP, Sole proprietorship, Non-profit, Trust, Other |
| Date of incorporation | Pick a date. |
| Place of incorporation | Type it. |
| Country of registration * | Choose from the list. |
| Registration authority | Type it. |
| Company registration number | Type it. |
| Tax identification number | Type it. |
| Legal entity identifier (LEI, 20 characters) | Type it. |
| Legal employer | Choose one: Yes, No |
| Payroll statutory unit | Choose one: Yes, No |
| Find head of the legal entity (name or code) | Optional: type part of a name or code to narrow the list below it. |
| Head of the legal entity | Choose from the list. |
| Website | Type it. |
| Company email | Type it. |
| Phone | Type it. |
| Compliance contact | Type it. |
| Compliance email (reminders go here) | Type it. |
| Currency | Choose from the list. |
| Time zone (for example Europe/London) | Type it. |
| Language | Choose from the list. |
| Date format (for example dd/MM/yyyy) | Type it. |
| Time format (for example HH:mm) | Type it. |
| Number format | Type it. |
| Week starts on | Choose one: Not set, Monday, Sunday, Saturday |
| Financial year starts in | Choose from the list. |
| Effective from * | Pick a date. |
| Effective to | Pick a date. |
| Display order | Type it. |
Then select Save as draft. The window closes and the table shows the record.
Other windows on this screen: Registrations (opened with Add a registration); Tax Units (opened with Add a tax reporting unit); Addresses (opened with Add an address); Banking (opened with Add a bank account); Officers (opened with Add an officer); Calendar (opened with Add a filing); Documents (opened with Add a document); Legal entity (opened with Open this legal entity); Map an organization (opened with Map an organization); Employees of the tax reporting unit (opened with Employees); Required documents (opened with Required documents); Tax by tax reporting unit (opened with Tax by unit for a payroll run); Move this legal entity (opened with Move); Deactivate this legal entity (opened with Close); Archive this legal entity (opened with Archive); Export (opened with Export); Change the selected legal entities (opened with a row action).
The table shows: Legal entity, Type, Country, Registration number, Tax ID, Designations, Employees, Organizations, Registrations, Documents held (%).
Locations
Open Core HR > Locations.
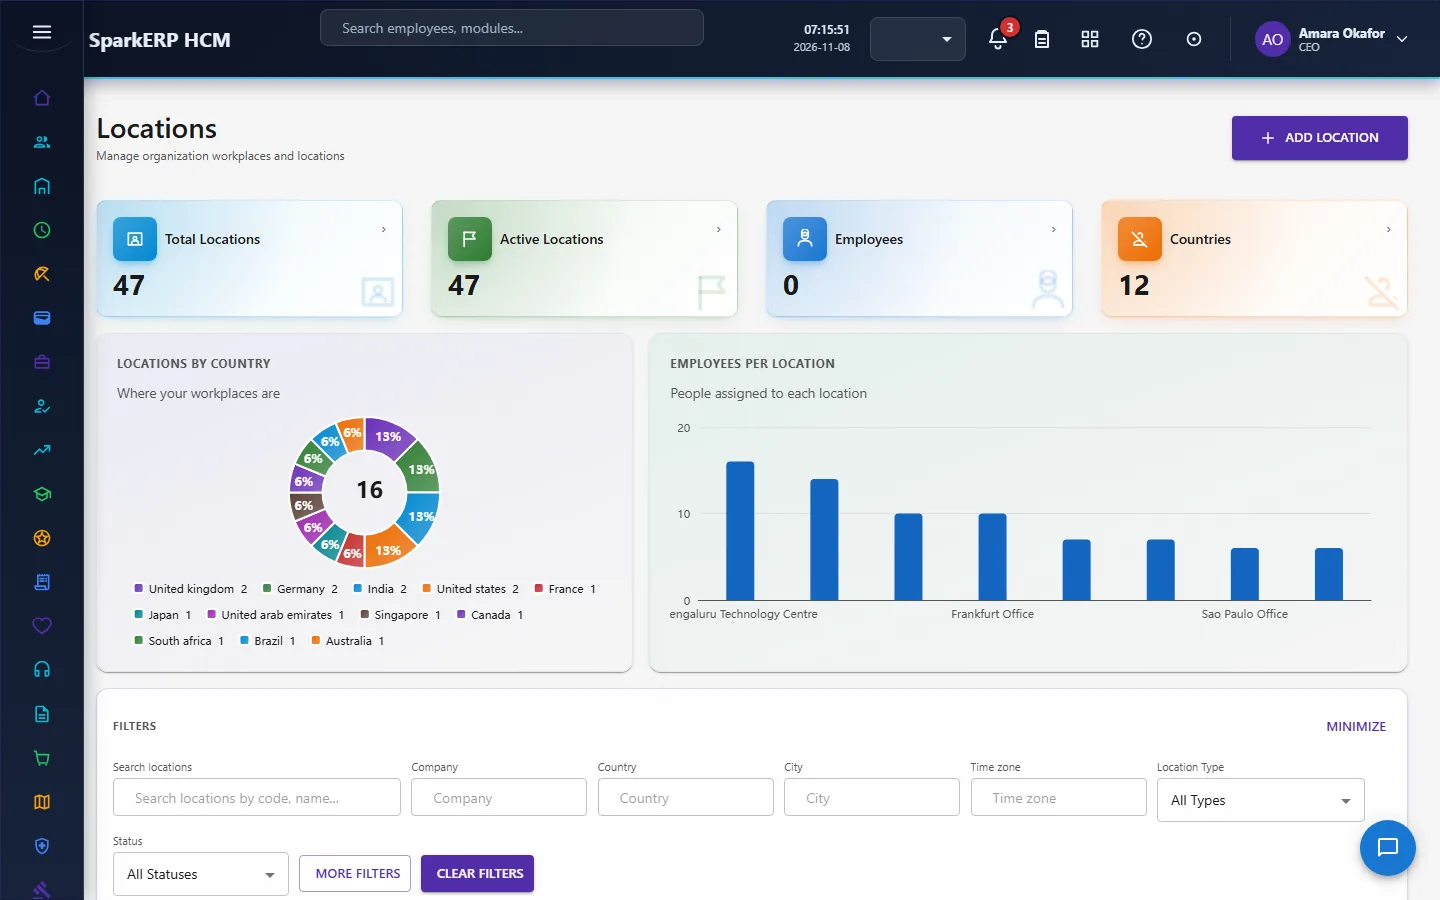
To add a record, select Add Location. In the window Location fill in (a star after a name means the screen requires it):
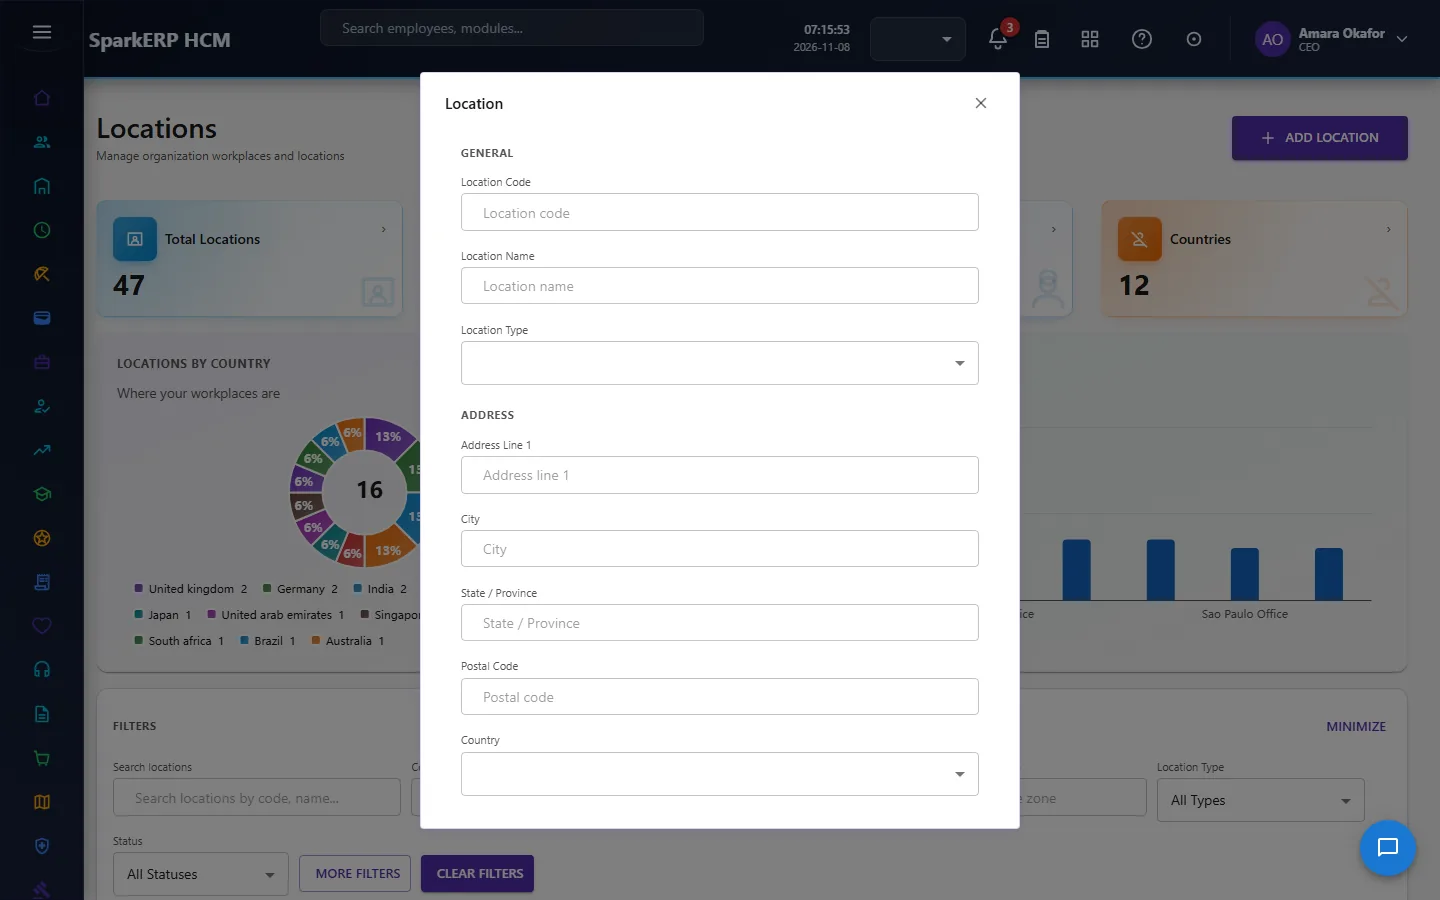
| Field | What to enter |
|---|---|
| Location Code | Type it (for example: Location code). |
| Location Name | Type it (for example: Location name). |
| Location Type | Choose one: Headquarters, Regional Office, Branch, Office, Plant, Factory, Warehouse, Store, Site, Project Site... |
| Address Line 1 | Type it (for example: Address line 1). |
| City | Type it. |
| State / Province | Type it. |
| Postal Code | Type it (for example: Postal code). |
| Country | Choose one: India, United States, United Kingdom, United Arab Emirates, Singapore, Australia, Other |
| Latitude | Type it. |
| Longitude | Type it. |
| Time Zone | Choose one: UTC, Asia/Kolkata (IST), Asia/Dubai (GST), Asia/Singapore (SGT), Europe/London (GMT/BST), America/New_York (ET), America/Los_Angeles (PT), Australia/Sydney (AEST) |
| Parent Location / Unit | Choose from the list. |
| Location Head | Choose from the list. |
| Effective From | Pick a date. |
| Effective To | Pick a date. |
| Status | Choose one: Active, Inactive, Draft |
| Description | Type it. |
Then select Save. The window closes and the table shows the record.
Other windows on this screen: Documents (opened with Add document); Contact (opened with Add contact details); Working hours (opened with Add working hours); More address details (opened with Add address details); Geofences (opened with Add geofence); Employees at this location (opened with Assign employee); Holiday calendars (opened with Assign calendar).
The table shows: Location, Type, Company, Business unit, City, State / province, Country, Time Zone, Employees, Manager.
Chapter 6. Departments, designations, grades and cost centers
The building blocks of your structure. Add them top down: departments, then the designations and grades people hold, then cost centers for budgets.
Departments
Open Core HR > Departments.
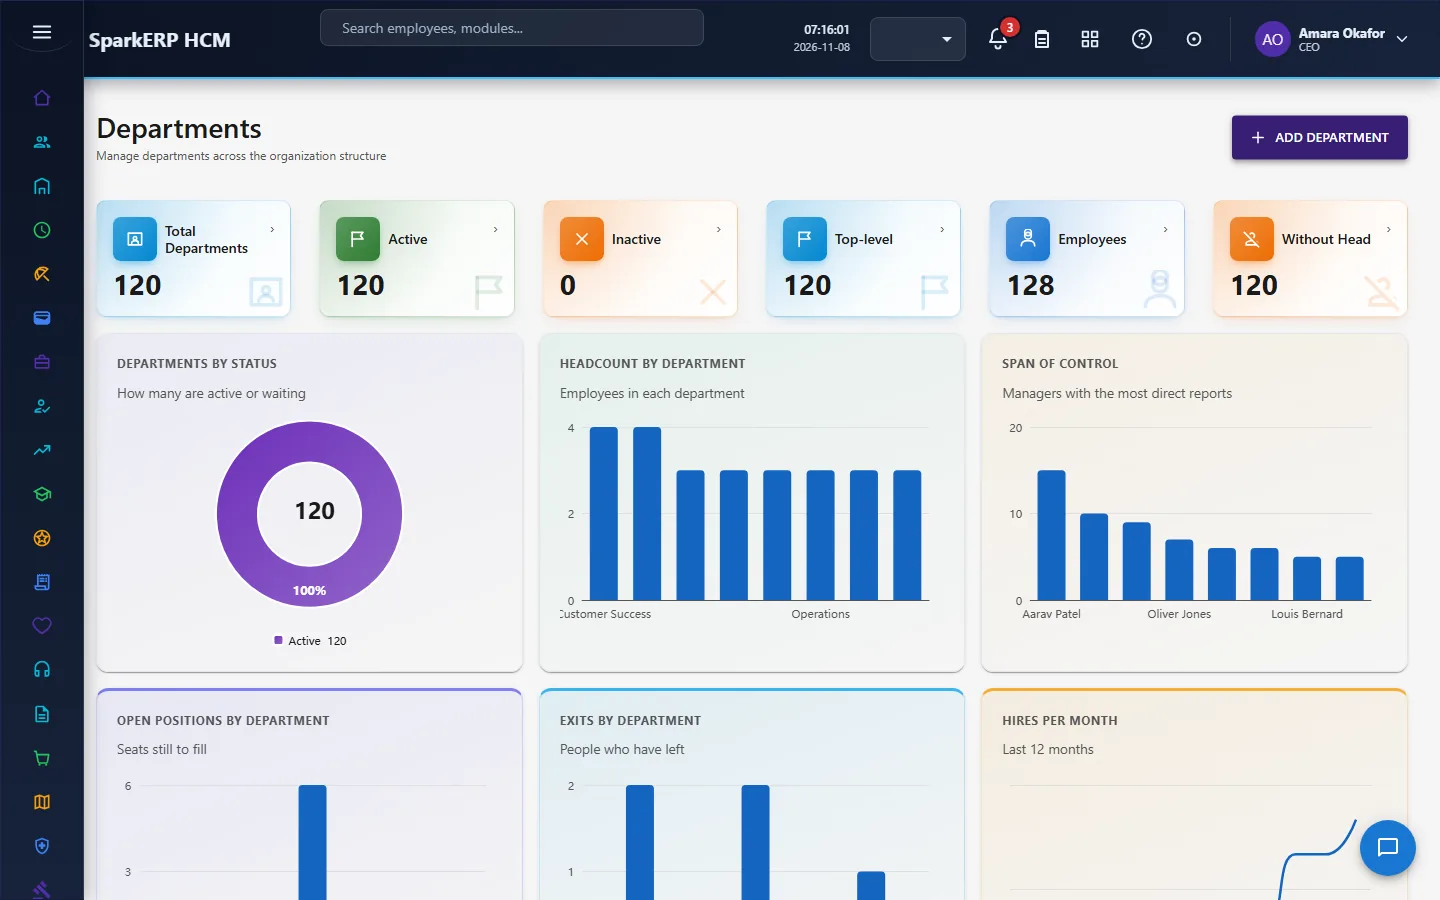
To add a record, select Add Department. In the window Department fill in (a star after a name means the screen requires it):
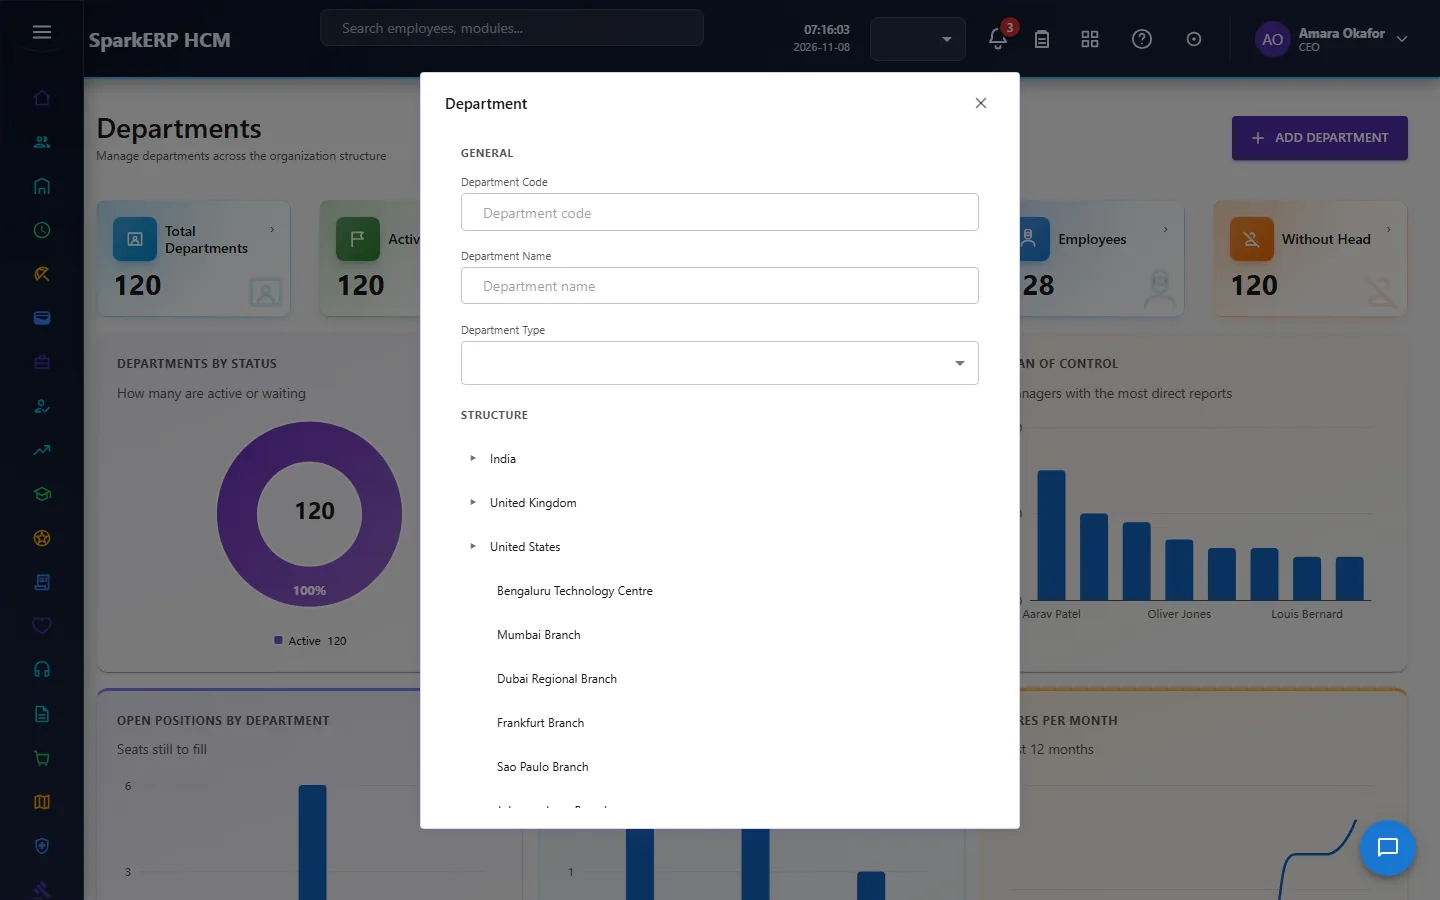
| Field | What to enter |
|---|---|
| Department Code | Type it (for example: Department code). |
| Department Name | Type it (for example: Department name). |
| Department Type | Choose one: Functional, Operational, Corporate, Support, Regional, Project, Shared Service, Other |
| Parent Department / Unit | Choose from the list. |
| Head of Department | Choose from the list. |
| Effective From | Pick a date. |
| Effective To | Pick a date. |
| Status | Choose one: Active, Inactive, Draft |
| Description | Type it. |
Then select Save. The window closes and the table shows the record.
Other windows on this screen: Documents (opened with Add document); Locations (opened with Map a location); Management history (opened with Assign manager); Move department (opened with Move department).
The table shows: Department, Type, Parent Department, Division, Business unit, Head of Department, Employees, Positions, Location, Cost center.
Designations
Open Core HR > Designations.
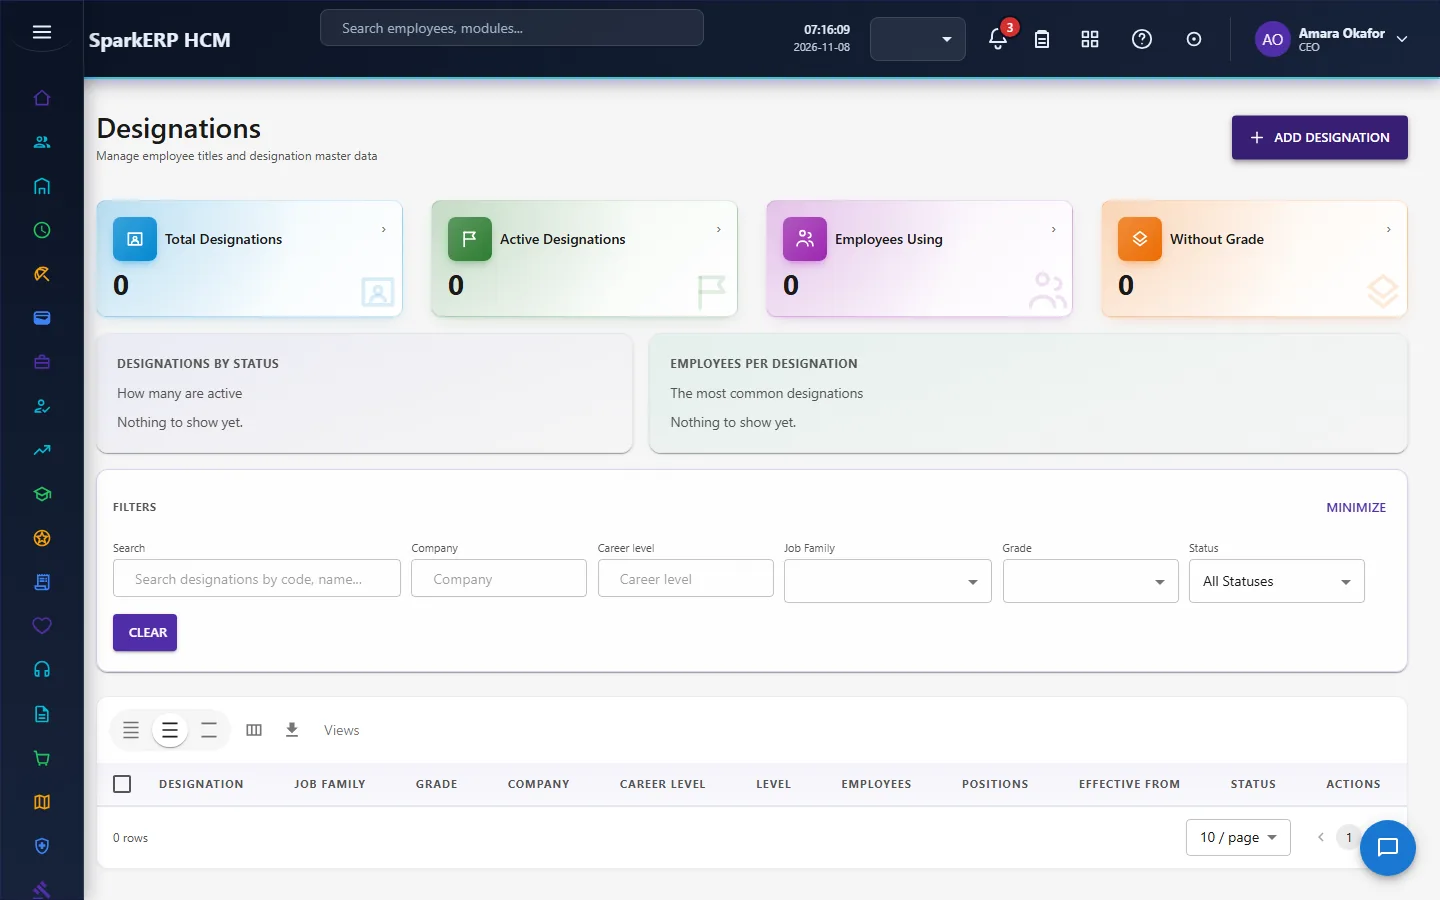
To add a record, select Add Designation. In the window Designation fill in (a star after a name means the screen requires it):
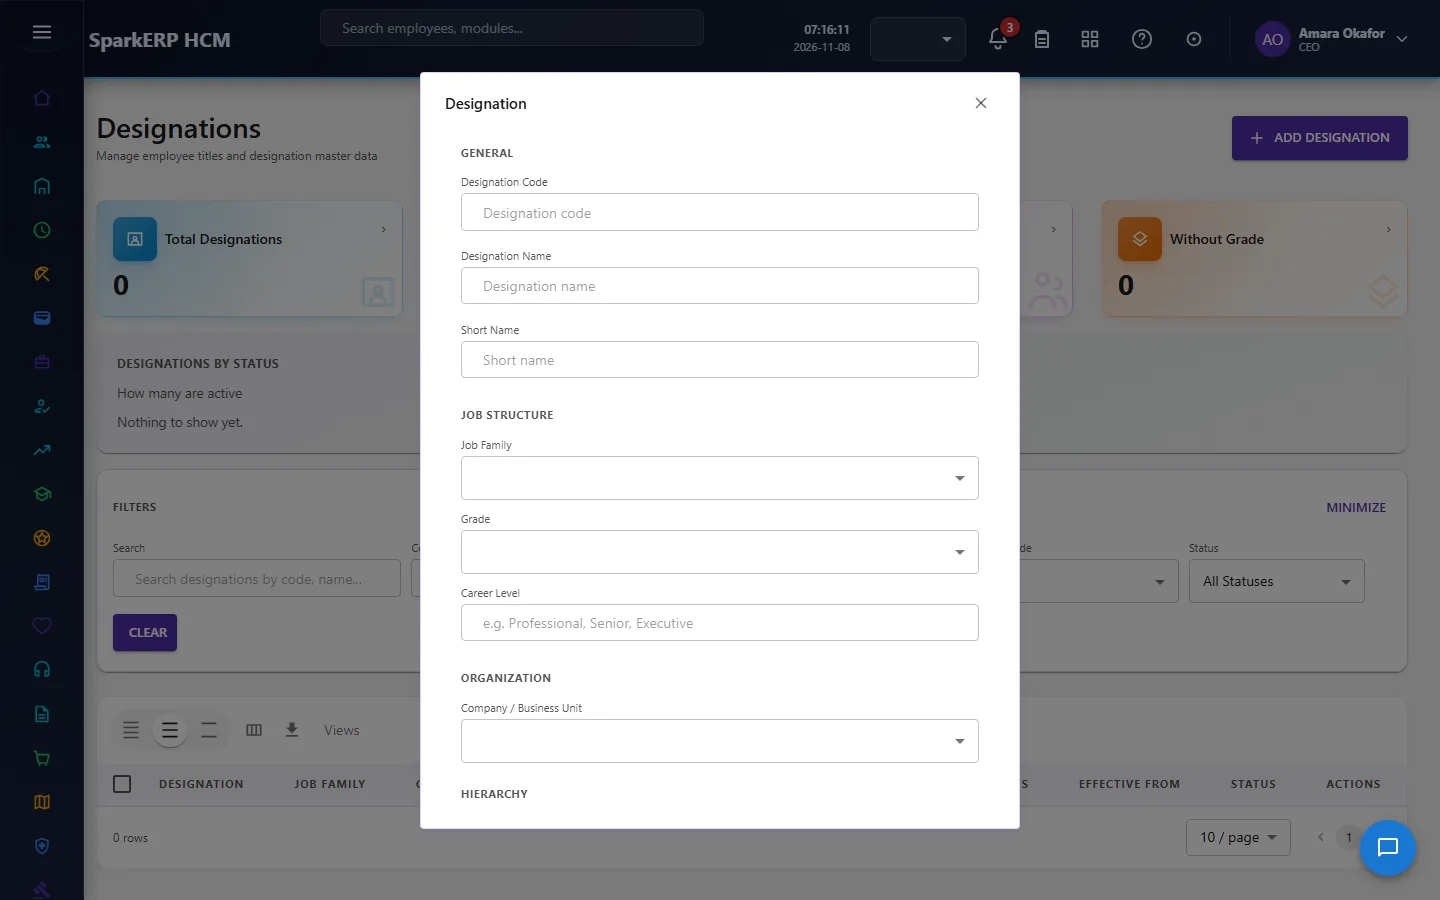
| Field | What to enter |
|---|---|
| Designation Code | Type it (for example: Designation code). |
| Designation Name | Type it (for example: Designation name). |
| Short Name | Type it (for example: Short name). |
| Job Family | Choose from the list. |
| Grade | Choose from the list. |
| Career Level | Type it (for example: e.g. Professional, Senior, Executive). |
| Company / Business Unit | Choose from the list. |
| Parent Designation | Choose from the list. |
| Designation Level | Type it. |
| Effective From | Pick a date. |
| Effective To | Pick a date. |
| Status | Choose one: Active, Inactive |
| Description | Type it (for example: Additional information). |
Then select Save Designation. The window closes and the table shows the record.
The table shows: Designation, Job Family, Grade, Company, Career Level, Level, Employees, Positions, Effective From, Status.
Job grades
Open Core HR > Job Grades.
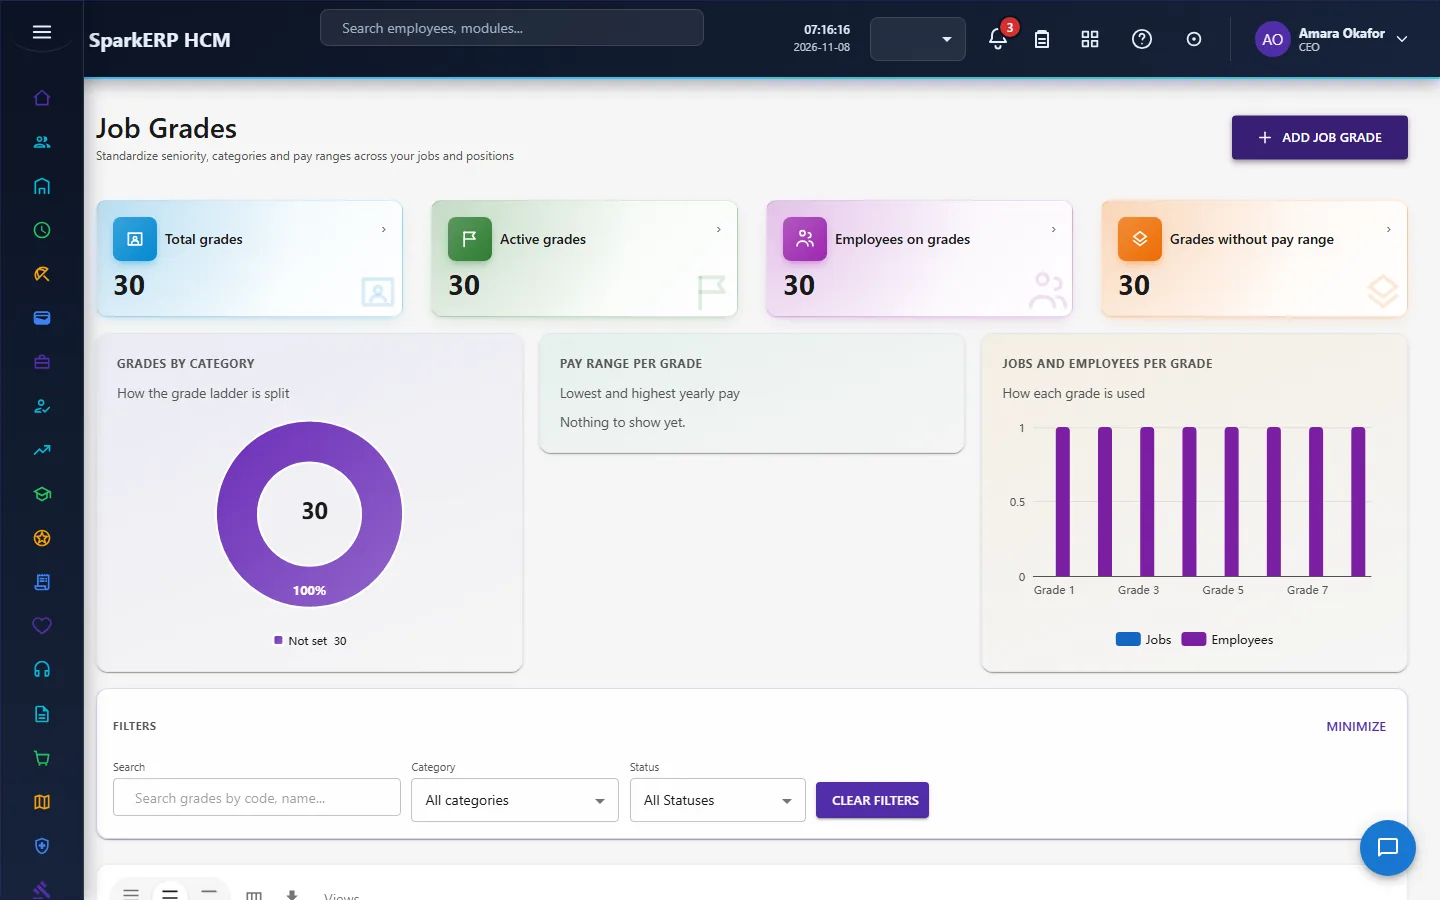
To add a record, select Add job grade. In the window Job Grade fill in (a star after a name means the screen requires it):
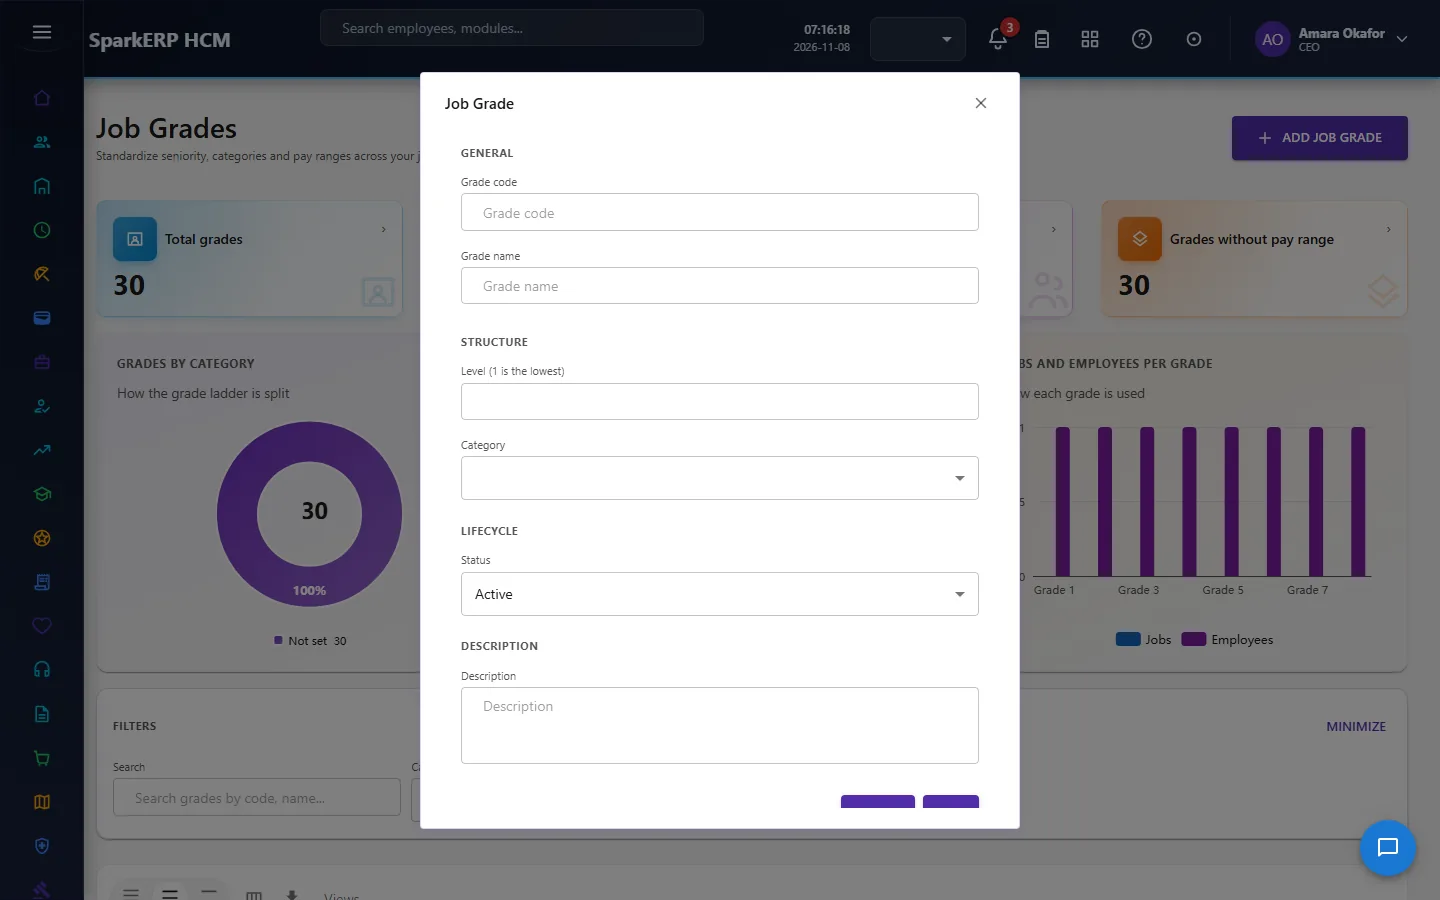
| Field | What to enter |
|---|---|
| Grade code | Type it. |
| Grade name | Type it. |
| Level (1 is the lowest) | Type it. |
| Category | Choose one: Entry level, Junior, Professional, Senior professional, Management, Senior management, Executive, Leadership |
| Status | Choose one: Active, Inactive |
| Description | Type it. |
Then select Save. The window closes and the table shows the record.
Other windows on this screen: Set a new pay range (opened with Set a new pay range).
The table shows: Grade, Level, Category, Currency, Minimum pay, Midpoint, Maximum pay, Employees, Status, Actions.
Cost centers
Open Core HR > Cost Centers.
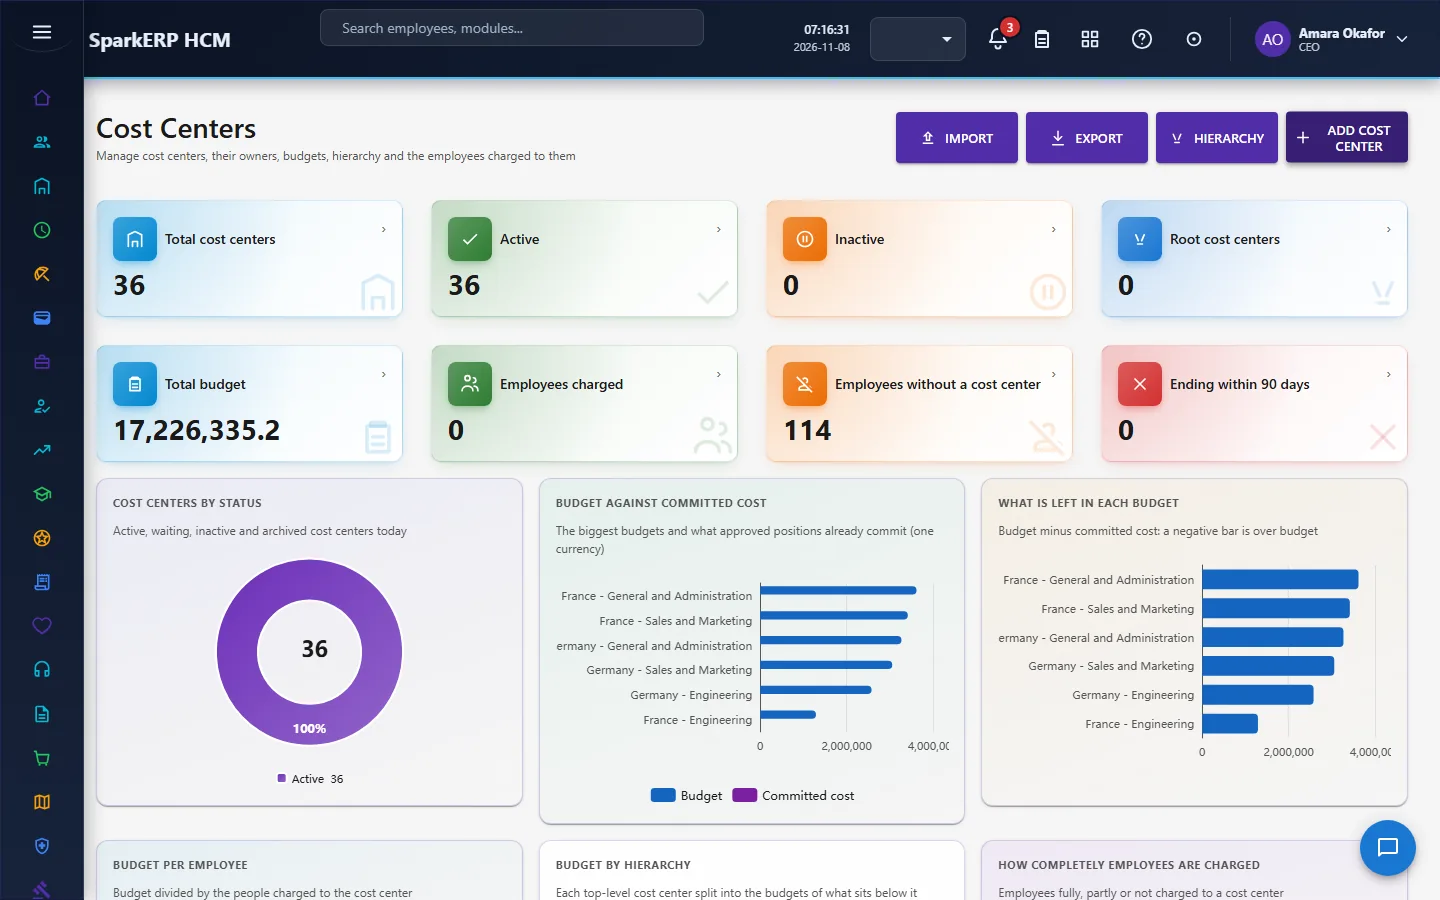
To add a record, select Add cost center. In the window Cost center fill in (a star after a name means the screen requires it):
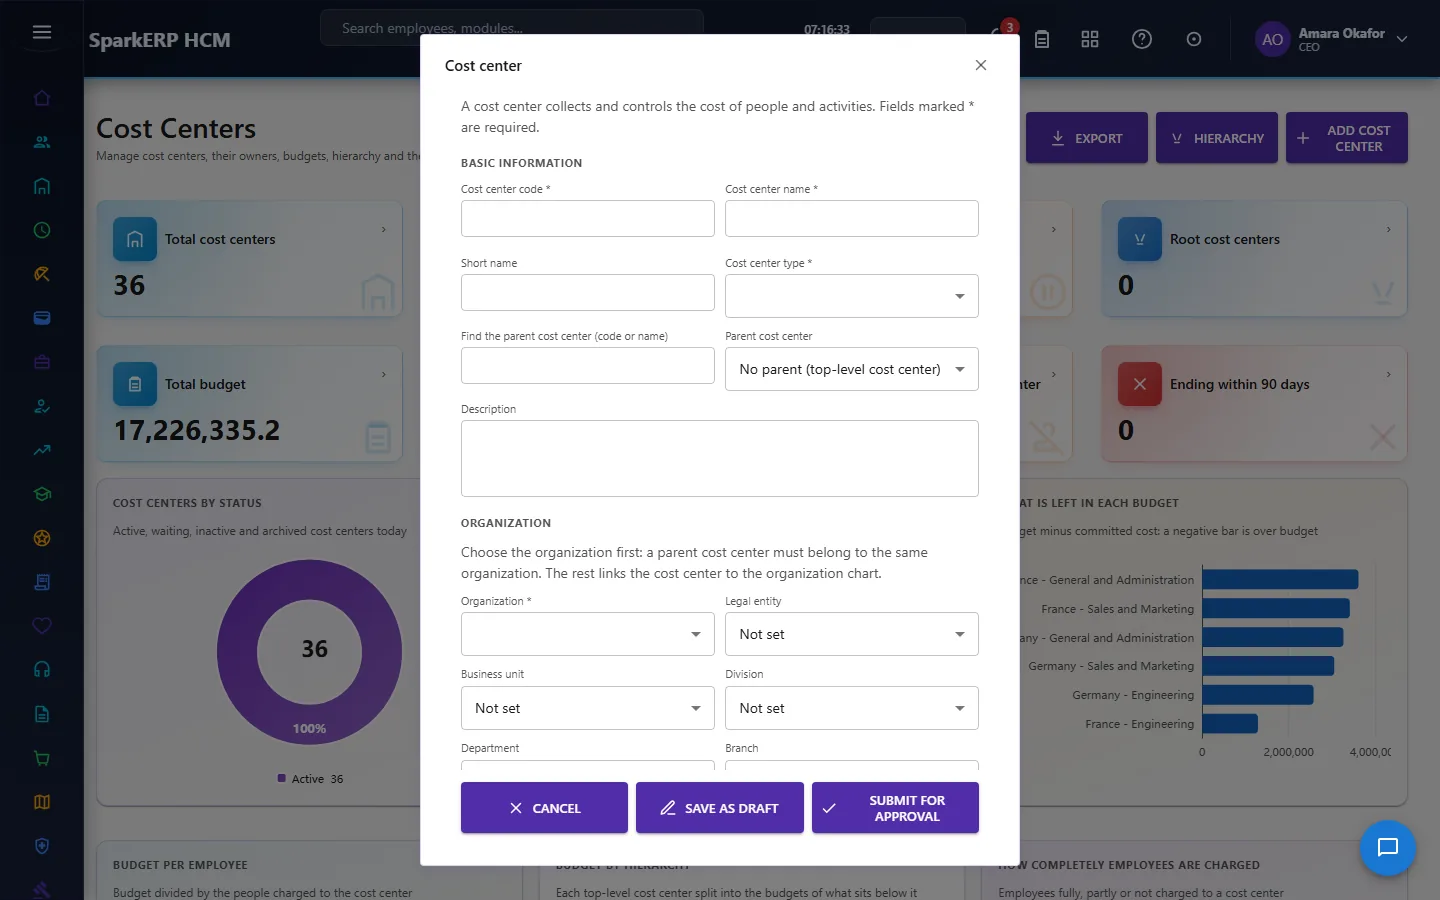
| Field | What to enter |
|---|---|
| Cost center code * | Type it. |
| Cost center name * | Type it. |
| Short name | Type it. |
| Cost center type * | Choose from the list. |
| Find the parent cost center (code or name) | Optional: type part of a name or code to narrow the list below it. |
| Parent cost center | Choose from the list. |
| Description | Type it. |
| Organization * | Choose from the list. |
| Legal entity | Choose from the list. |
| Business unit | Choose from the list. |
| Division | Choose from the list. |
| Department | Choose from the list. |
| Branch | Choose from the list. |
| Location | Choose from the list. |
| Find cost center manager (name or code) | Optional: type part of a name or code to narrow the list below it. |
| Cost center manager | Choose from the list. |
| Find finance owner (name or code) | Optional: type part of a name or code to narrow the list below it. |
| Finance owner | Choose from the list. |
| GL account code | Type it. |
| Accounting dimension | Type it. |
| Finance cost code | Type it. |
| Annual budget | Type it. |
| Currency | Choose from the list. |
| Fiscal year | Choose from the list. |
| Effective from * | Pick a date. |
| Effective to | Pick a date. |
| Display order | Type it. |
| Allocation notes | Type it. |
Then select Save as draft. The window closes and the table shows the record.
Other windows on this screen: Add a document (opened with Add a document); Assign a role (opened with Assign manager); Charge an employee to this cost center (opened with Charge an employee); Set the budget (opened with Set budget); Split the budget by month (opened with Set the months); Move this cost center (opened with Move); Deactivate this cost center (opened with Deactivate); Archive this cost center (opened with Archive); Export (opened with Export); Change the selected cost centers (opened with a row action).
The table shows: Cost center, Type, Parent cost center, Organization, Business unit, Manager, Employees, Annual budget, Used, GL account.
Employment types
Open Core HR > Employment Types.
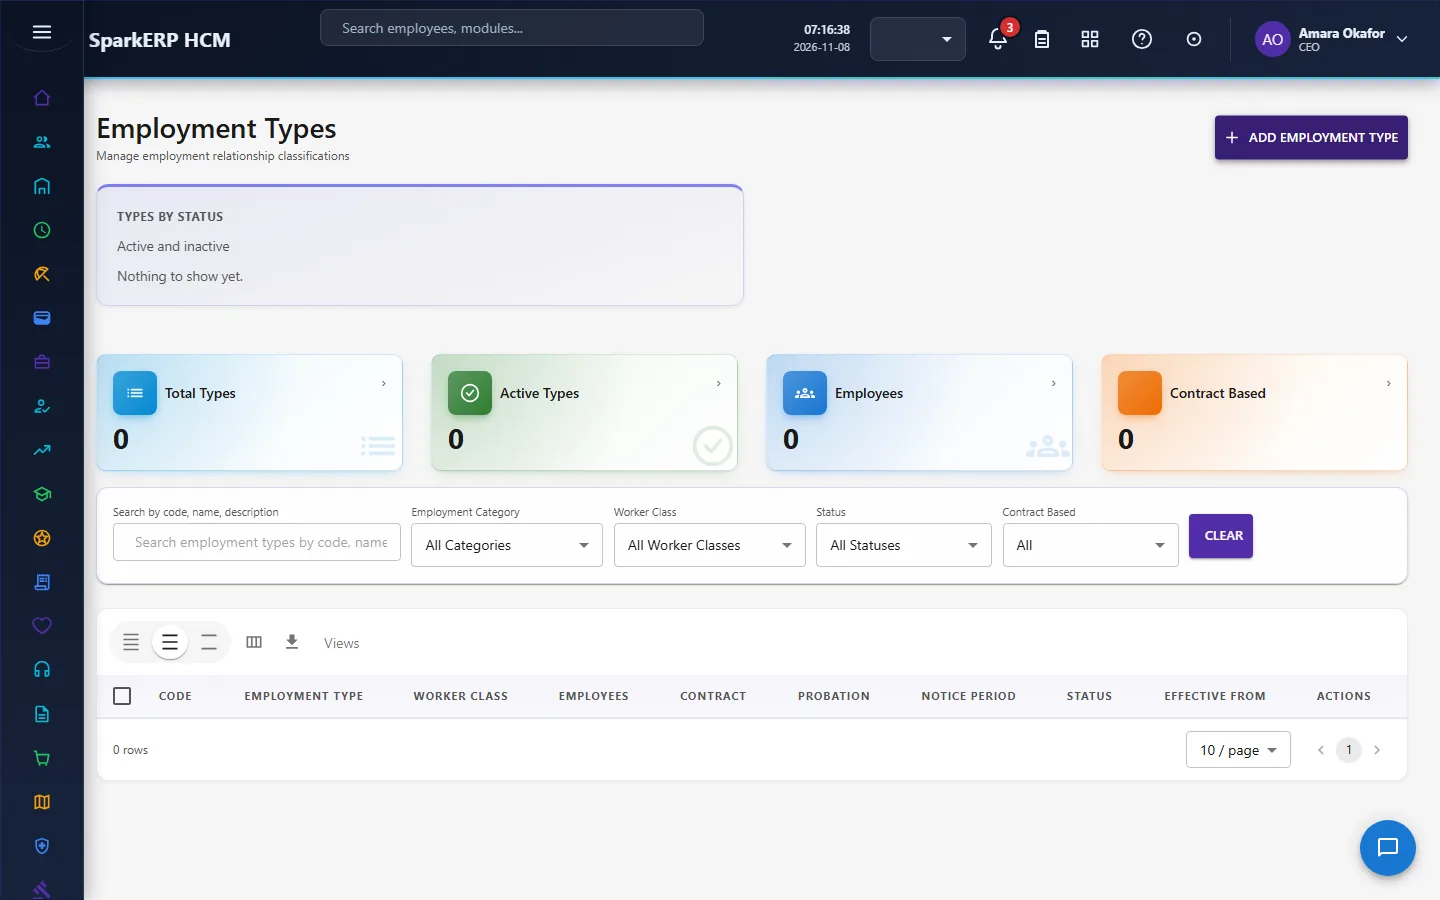
To add a record, select Add Employment Type. In the window Employment Type fill in (a star after a name means the screen requires it):
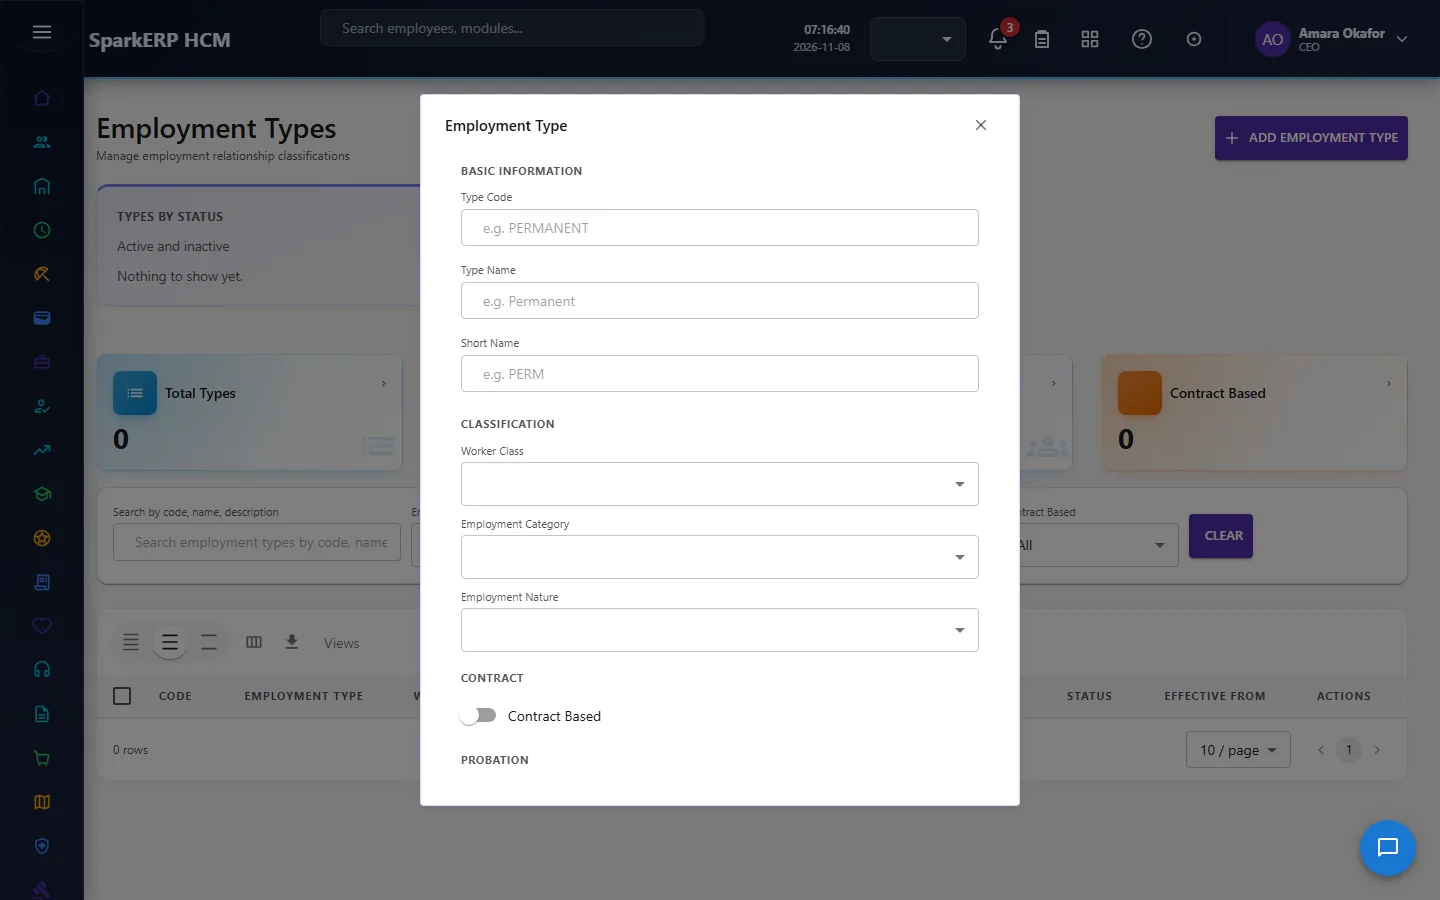
| Field | What to enter |
|---|---|
| Type Code | Type it (for example: e.g. PERMANENT). |
| Type Name | Type it (for example: e.g. Permanent). |
| Short Name | Type it (for example: e.g. PERM). |
| Worker Class | Choose one: Staff, Worker, Executive, Trainee, Non-Employee |
| Employment Category | Choose one: Regular, Non-Regular |
| Employment Nature | Choose one: Permanent, Temporary, Contract, Intern, Consultant |
| Contract Based | Tick or untick. |
| Contract Type | Choose one: Indefinite, Fixed Term, Project Based, Agency |
| Fixed Term | Tick or untick. |
| Probation Applicable | Tick or untick. |
| Probation Period | Type it. |
| Probation Period Unit | Choose one: Days, Weeks, Months, Years |
| Notice Required | Tick or untick. |
| Notice Period | Type it. |
| Notice Period Unit | Choose one: Days, Weeks, Months, Years |
| Benefits Eligible | Tick or untick. |
| Payroll Eligible | Tick or untick. |
| Leave Eligible | Tick or untick. |
| Effective From | Pick a date. |
| Effective To | Pick a date. |
| Status | Choose one: Draft, Active, Inactive, Retired |
| Description | Type it (for example: Optional description...). |
Then select Save Type. The window closes and the table shows the record.
The table shows: Code, Employment Type, Worker Class, Employees, Contract, Probation, Notice Period, Status, Effective From, Actions.
Job positions
Open Core HR > Job Positions.
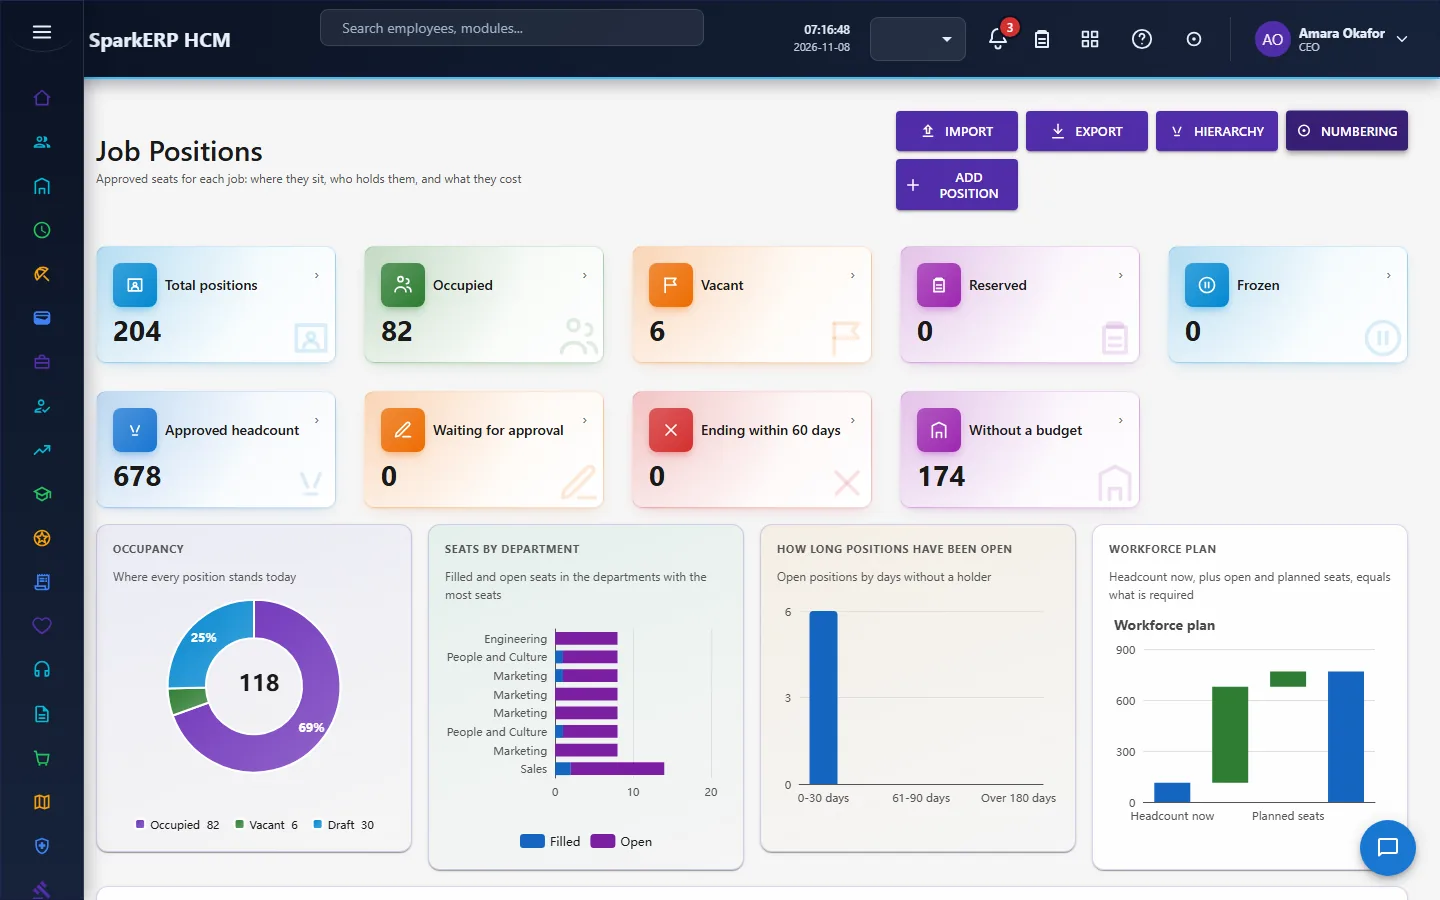
To add a record, select Add position. In the window Job position fill in (a star after a name means the screen requires it):
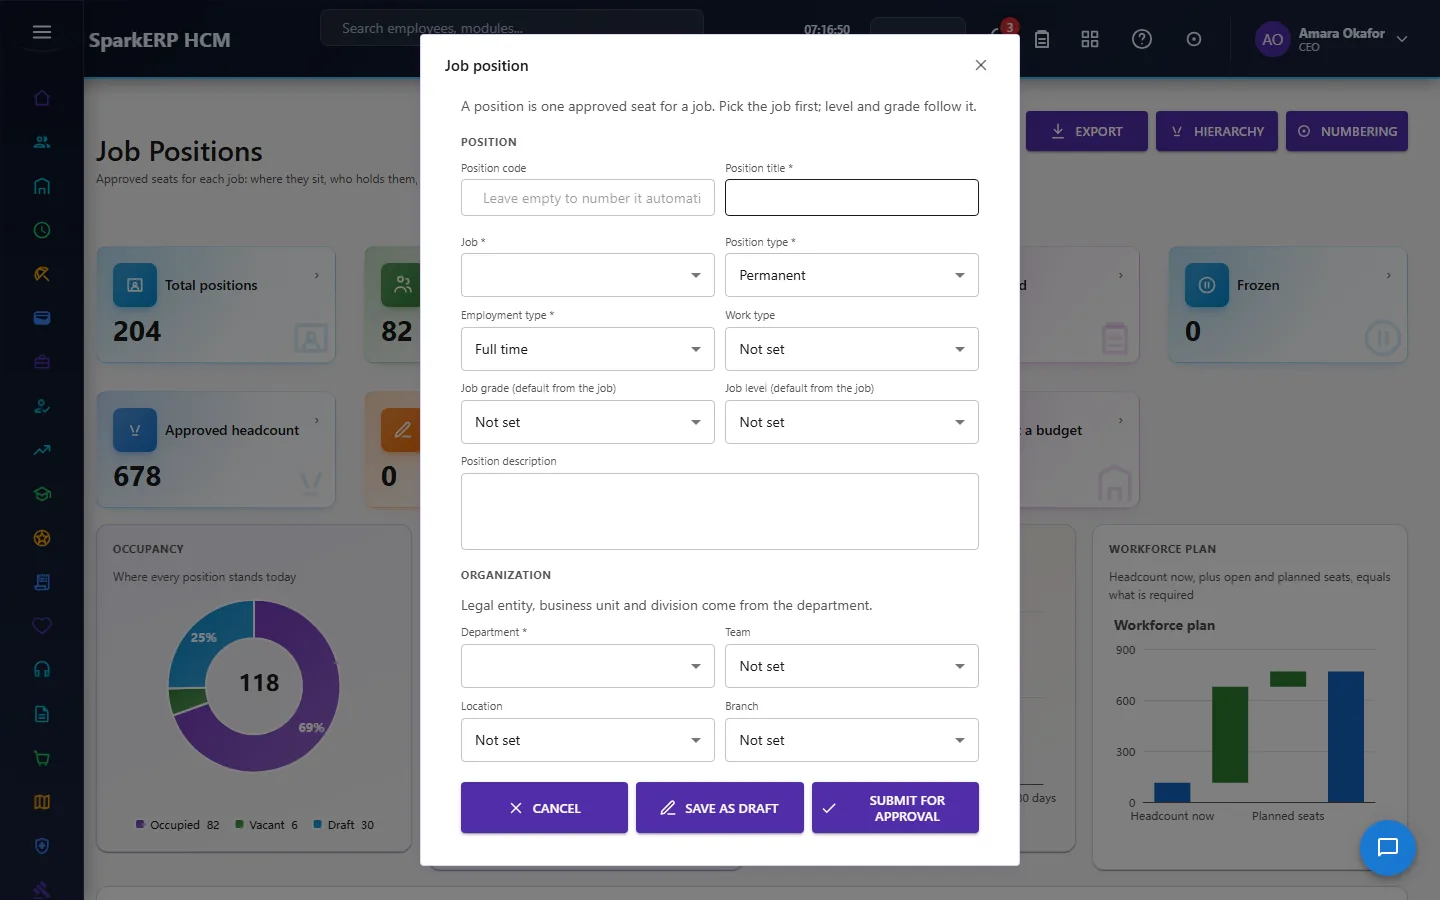
| Field | What to enter |
|---|---|
| Position code | Type it (for example: Leave empty to number it automatically). |
| Position title * | Type it. |
| Job * | Choose from the list. |
| Position type * | Choose one: Permanent, Temporary, Contract, Seasonal, Project, Intern, Apprentice, Consultant, Other |
| Employment type * | Choose one: Full time, Part time, Contract, Intern, Consultant |
| Work type | Choose one: Not set, On site, Hybrid, Remote, Field |
| Job grade (default from the job) | Choose from the list. |
| Job level (default from the job) | Choose from the list. |
| Position description | Type it. |
| Department * | Choose from the list. |
| Team | Choose from the list. |
| Location | Choose from the list. |
| Branch | Choose from the list. |
| Cost center | Choose from the list. |
| Profit center | Choose from the list. |
| Find the reporting position (code or title) | Optional: type part of a name or code to narrow the list below it. |
| Reports to position | Choose from the list. |
| Approved headcount (seats) | Type it. |
| Budgeted | Choose one: Yes, No |
| Annual budget per seat | Type it. |
| Currency (for example USD) | Type it. |
| Effective from | Pick a date. |
| Effective to | Pick a date. |
| Apply an approved change on (optional) | Pick a date. |
Then select Save as draft. The window closes and the table shows the record.
Other windows on this screen: Other reporting lines (opened with Add a reporting line); Assign an employee (opened with Assign employee); Release an employee (opened with Release employee); Transfer an employee (opened with Transfer employee); Reserve this position (opened with Reserve); Freeze this position (opened with Freeze); Close this position (opened with Close position); Position budget (opened with Set budget); Export (opened with Export); Position numbering (opened with Numbering); Change the selected positions (opened with a row action).
The table shows: Position, Job, Department, Location, Grade, Employee, Seats, Occupancy, Status, Level.
Chapter 7. People and roles
Create sign-in accounts and decide what each person may do. An account is not an employee record: the employee record lives in Core HR.
HCM Users
Open Administration > HCM Users.
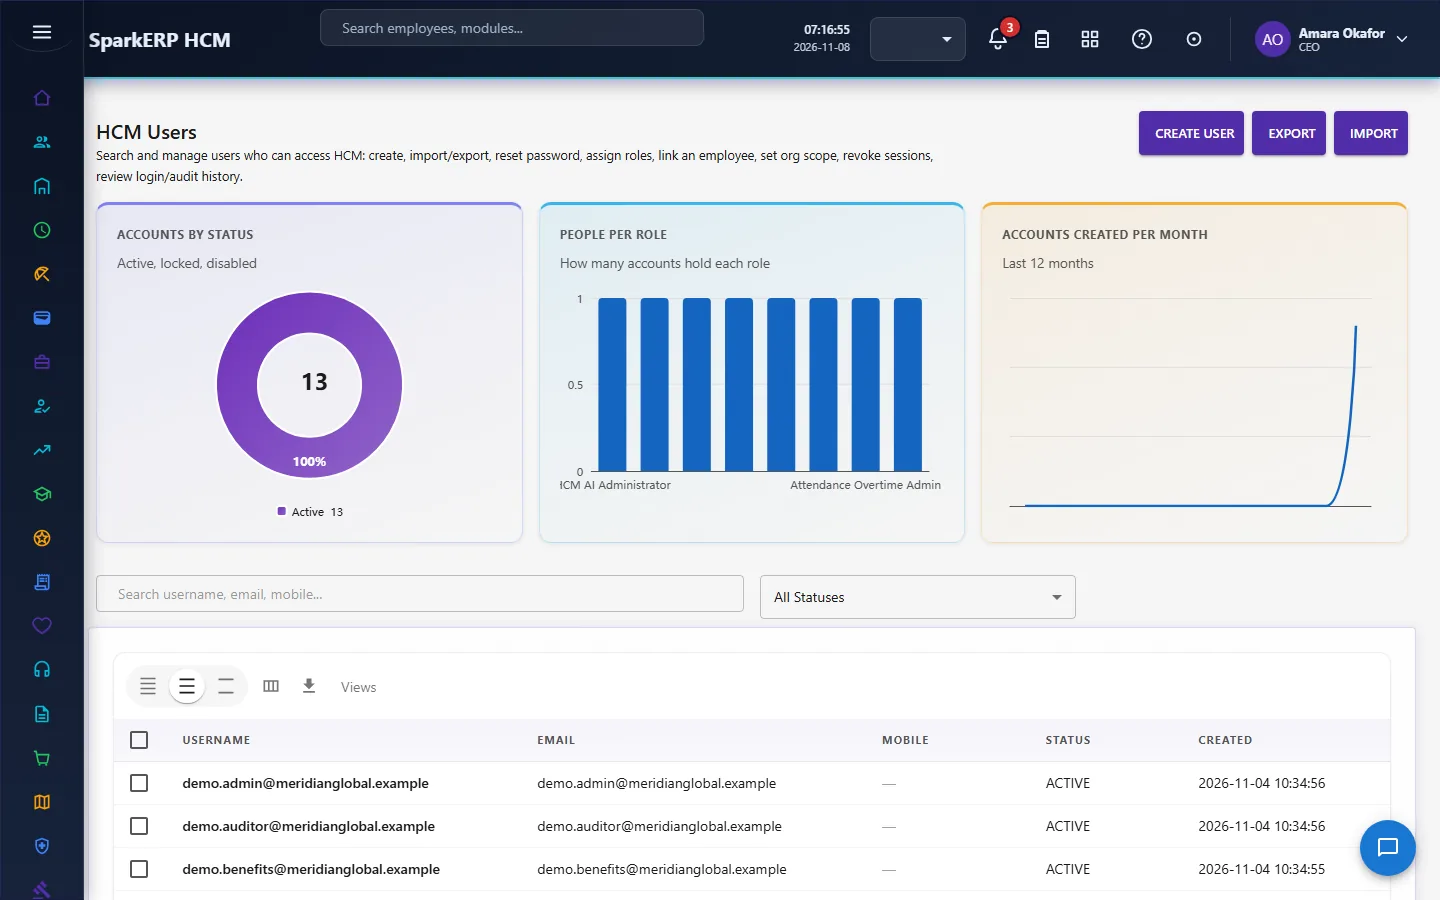
To add a record, select Create User. In the window Create HCM User fill in (a star after a name means the screen requires it):
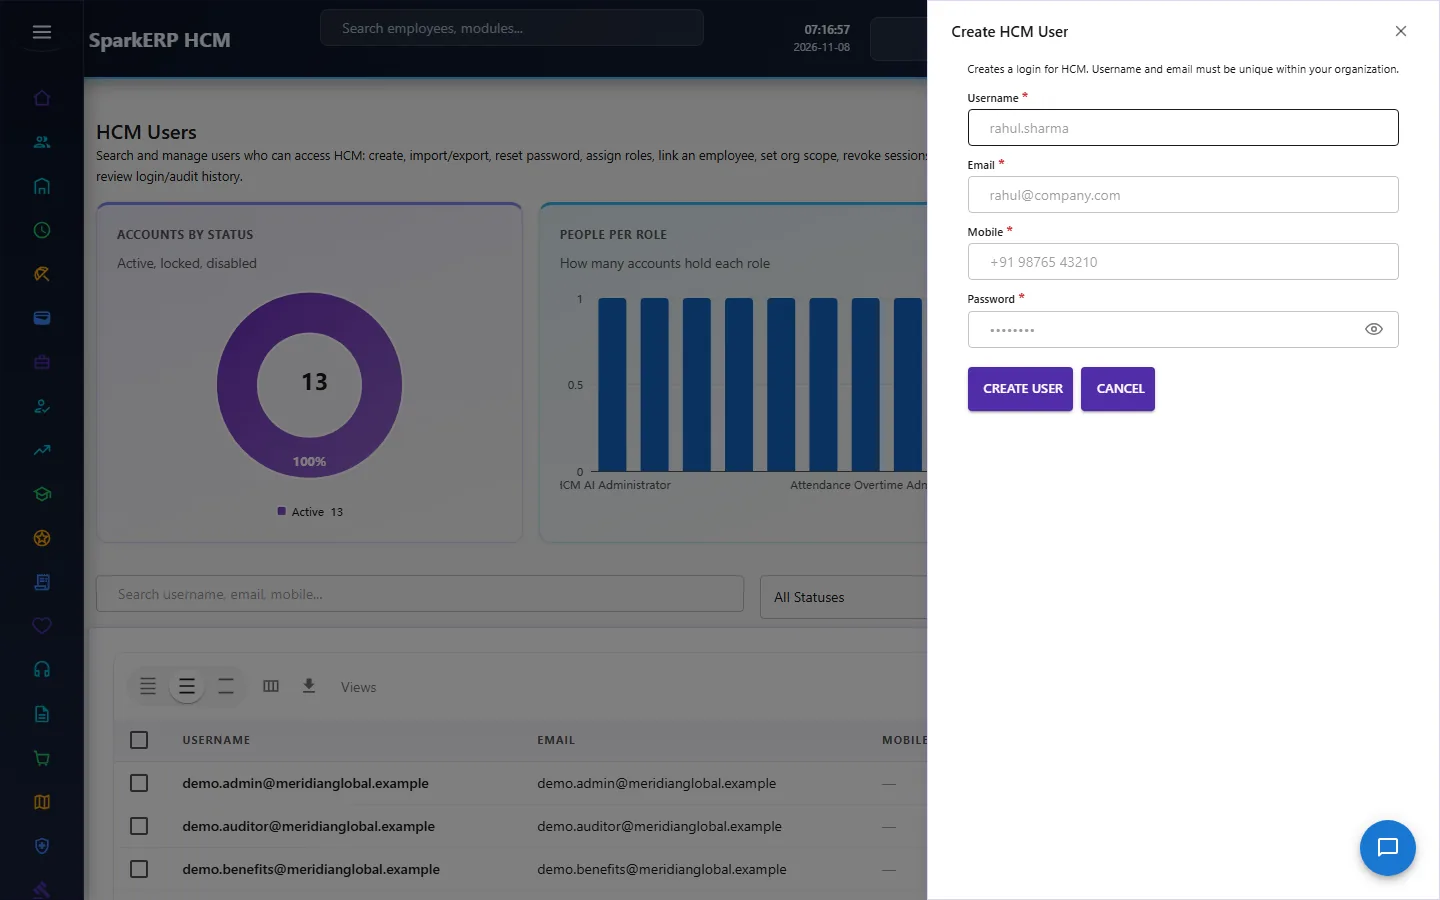
| Field | What to enter |
|---|---|
| rahul@company.com | Type it. |
| +91 98765 43210 | Type it. |
| •••••••• | Type it. |
Then select Create User. The window closes and the table shows the record.
Other windows on this screen: User Details (opened with a row action).
The table shows: Username, Email, Mobile, Status, Created.
Permissions
Open the HCM menu.
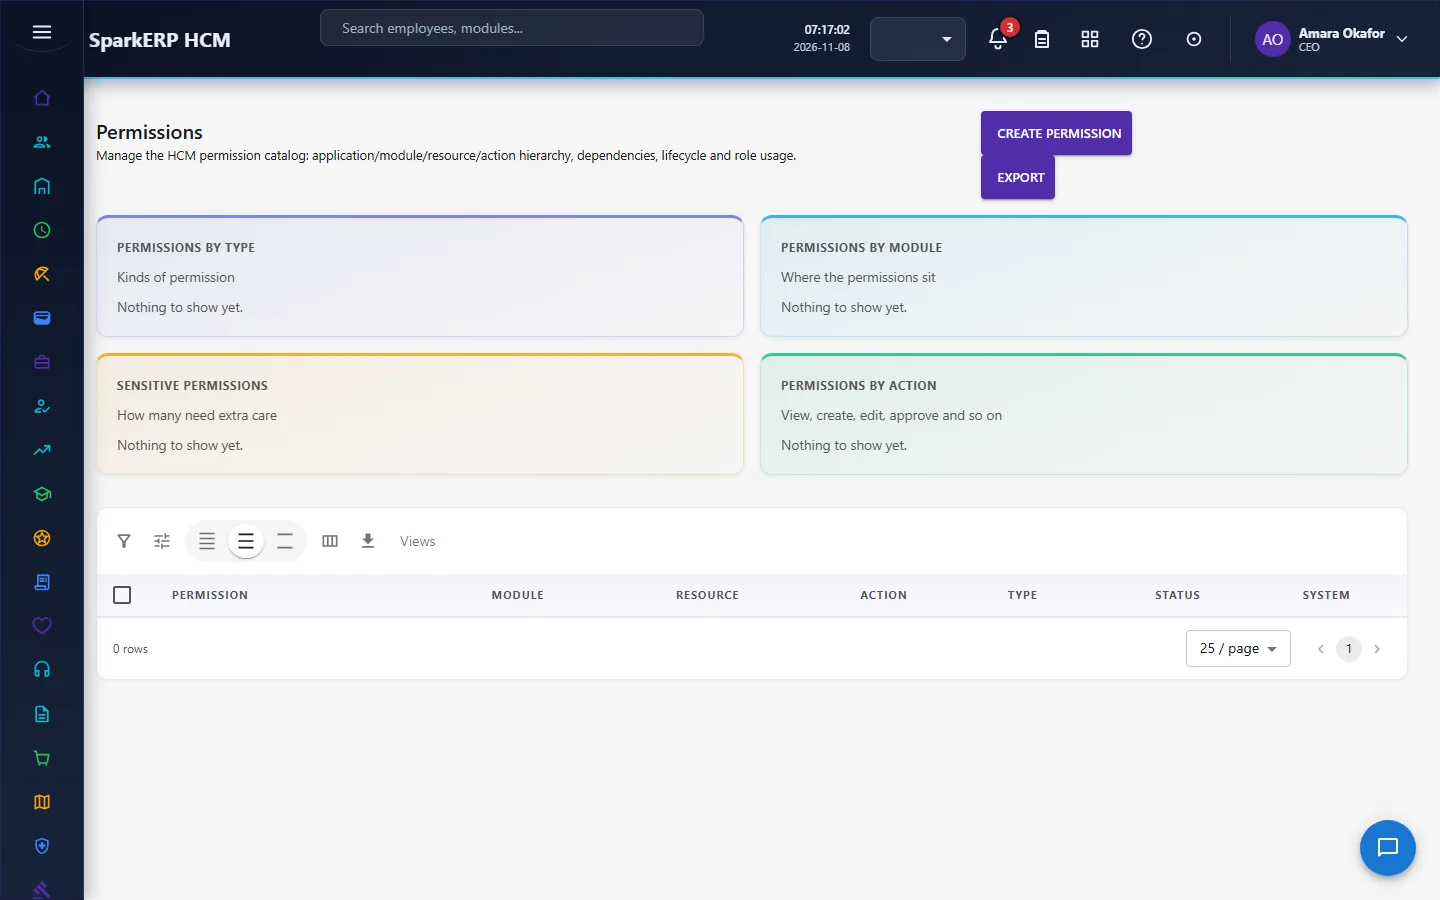
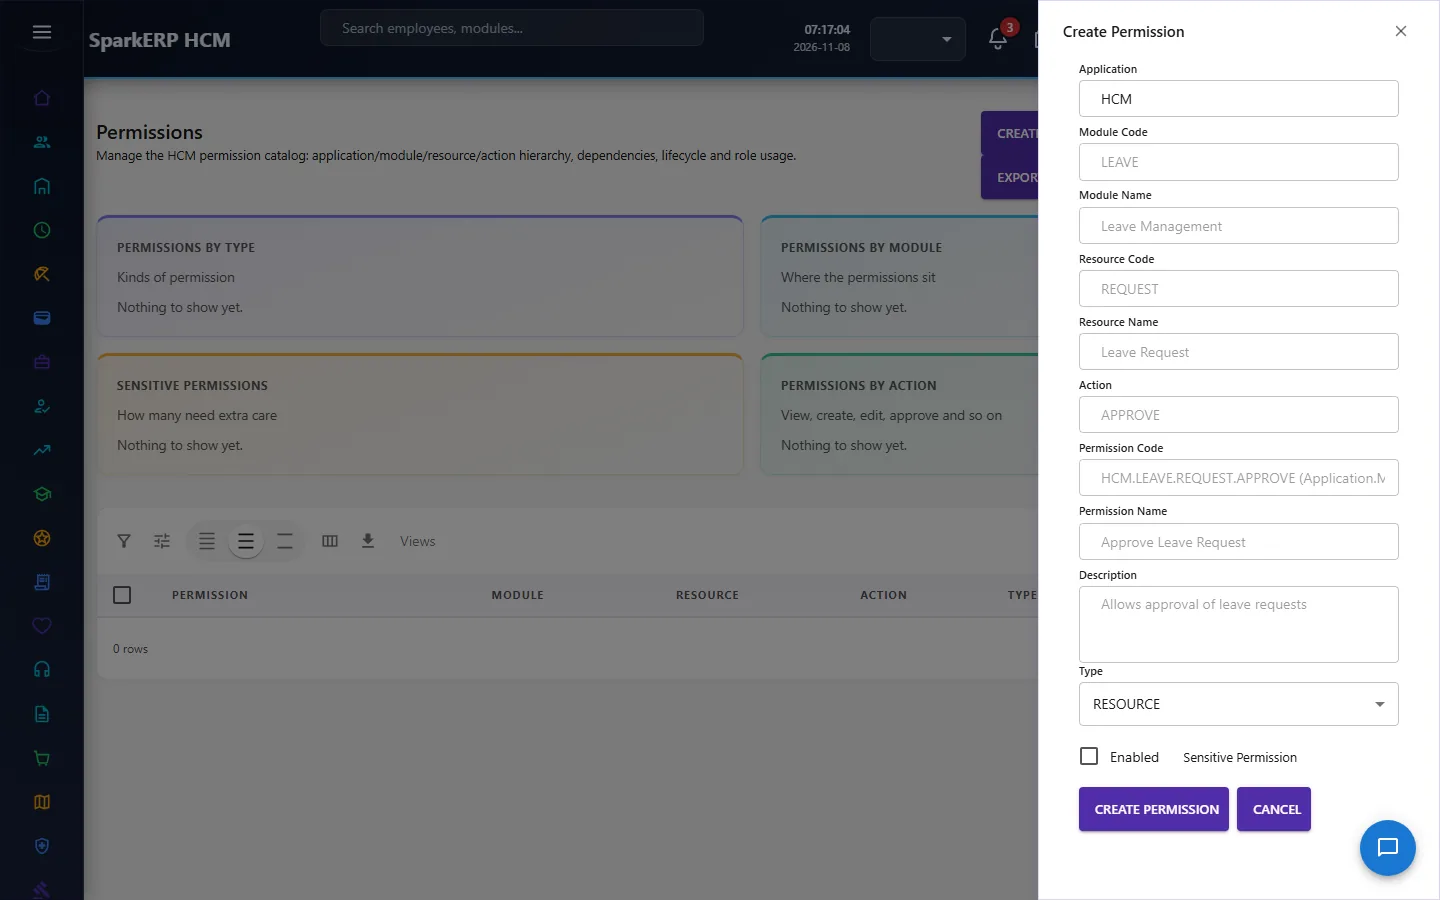
To add a record, select Create Permission. In the window Create Permission fill in (a star after a name means the screen requires it):
| Field | What to enter |
|---|---|
| HCM | Type it. |
| LEAVE | Type it. |
| Leave Management | Type it. |
| REQUEST | Type it. |
| Leave Request | Type it. |
| APPROVE | Type it. |
| HCM.LEAVE.REQUEST.APPROVE (Application.Module.Resource.Action) | Type it. |
| Approve Leave Request | Type it. |
| Allows approval of leave requests | Type it. |
Then select Create Permission. The window closes and the table shows the record.
Other windows on this screen: Permission Details (opened with a row action).
The table shows: Permission, Module, Resource, Action, Type, Status, System.
Chapter 8. Employees
Add people only after the structure above exists, so each person lands in the right place. Employees are added one at a time. There is no file import for employees yet: Data Import (see the Leave chapter) loads leave types, organization tags, permissions and market rates, and HCM Users can import sign-in accounts, but neither creates employee records.
Employee Directory (add one employee)
Open Core HR > Employee Directory.
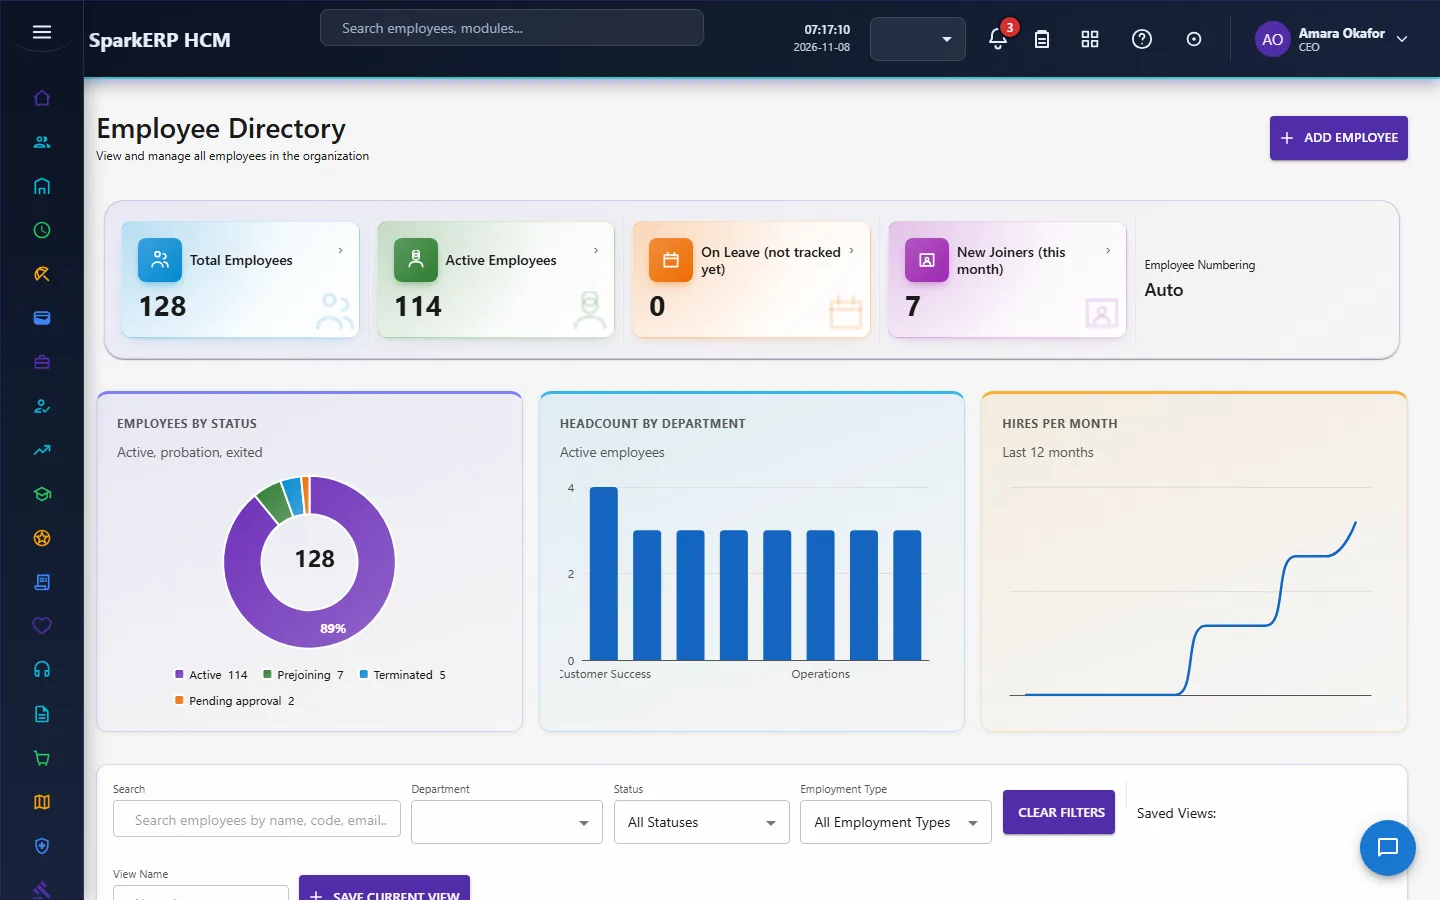
To add a record, select Add Employee. In the window Add Employee fill in (a star after a name means the screen requires it):
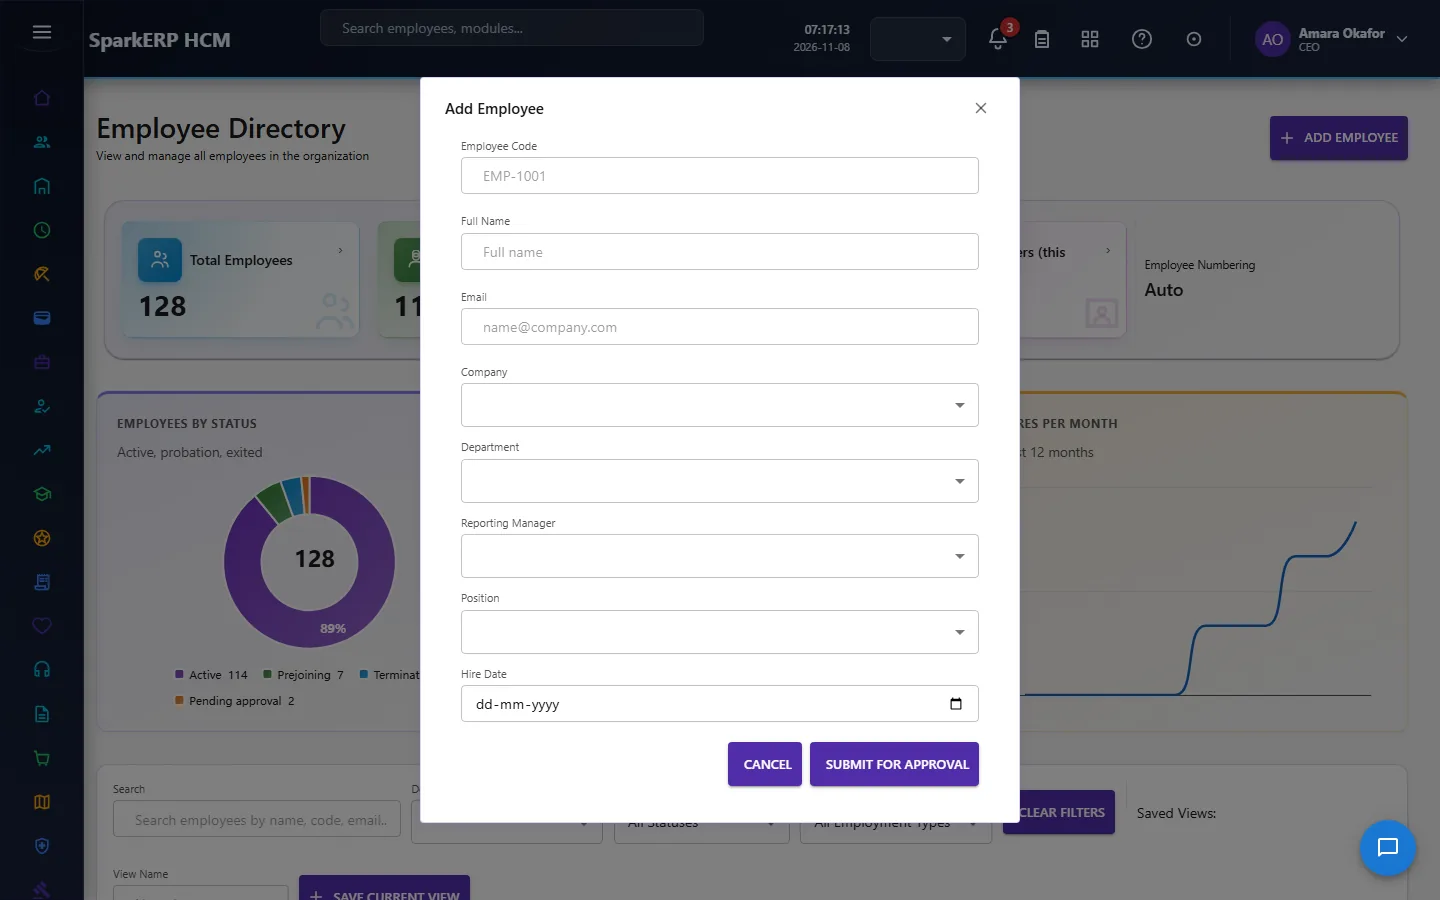
| Field | What to enter |
|---|---|
| Employee Code | Type it (for example: EMP-1001). |
| Full Name | Type it (for example: Full name). |
| Type it (for example: name@company.com). | |
| Company | Choose from the list. |
| Department | Choose from the list. |
| Reporting Manager | Choose from the list. |
| Position | Choose from the list. |
| Hire Date | Pick a date. |
Then select Submit for Approval. The record is saved with the status Pending approval and an approval request goes to the approver. It becomes Active when it is approved. Who approves is set under Administration > Approval Hierarchies.
Other windows on this screen: Change Department (opened with a row action); Change Manager (opened with a row action).
The table shows: Name, Job Title, Department, Manager, Employment Type, Joining Date, Status, Email, Phone, Actions.
Chapter 9. Leave
What kinds of leave exist and who gets how much.
Leave types
Open Leave Management > Leave Types.
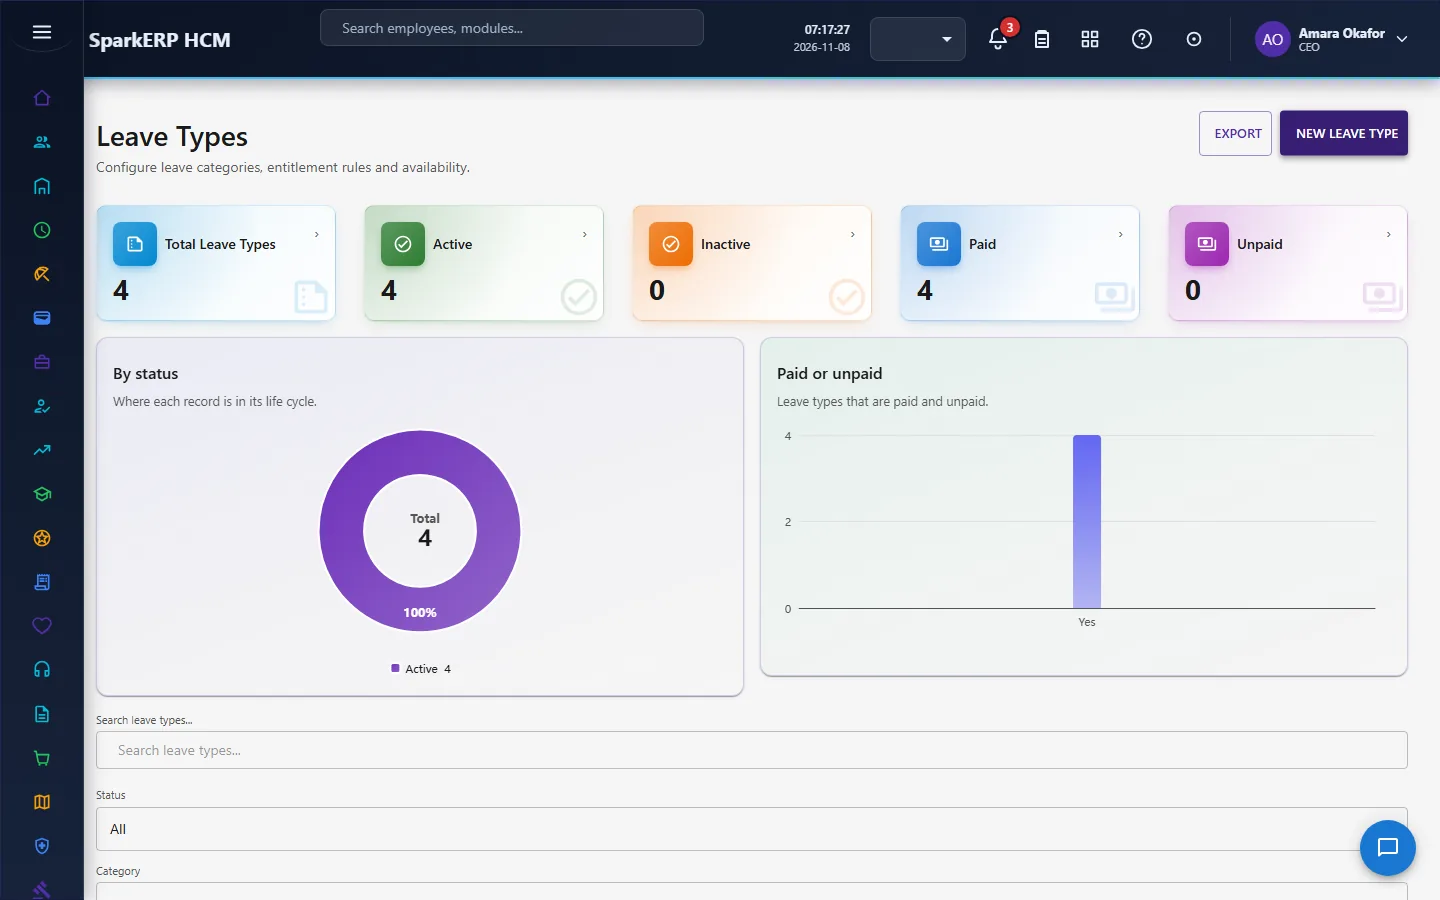
To add a record, select New Leave Type. In the window Leave Type fill in (a star after a name means the screen requires it):
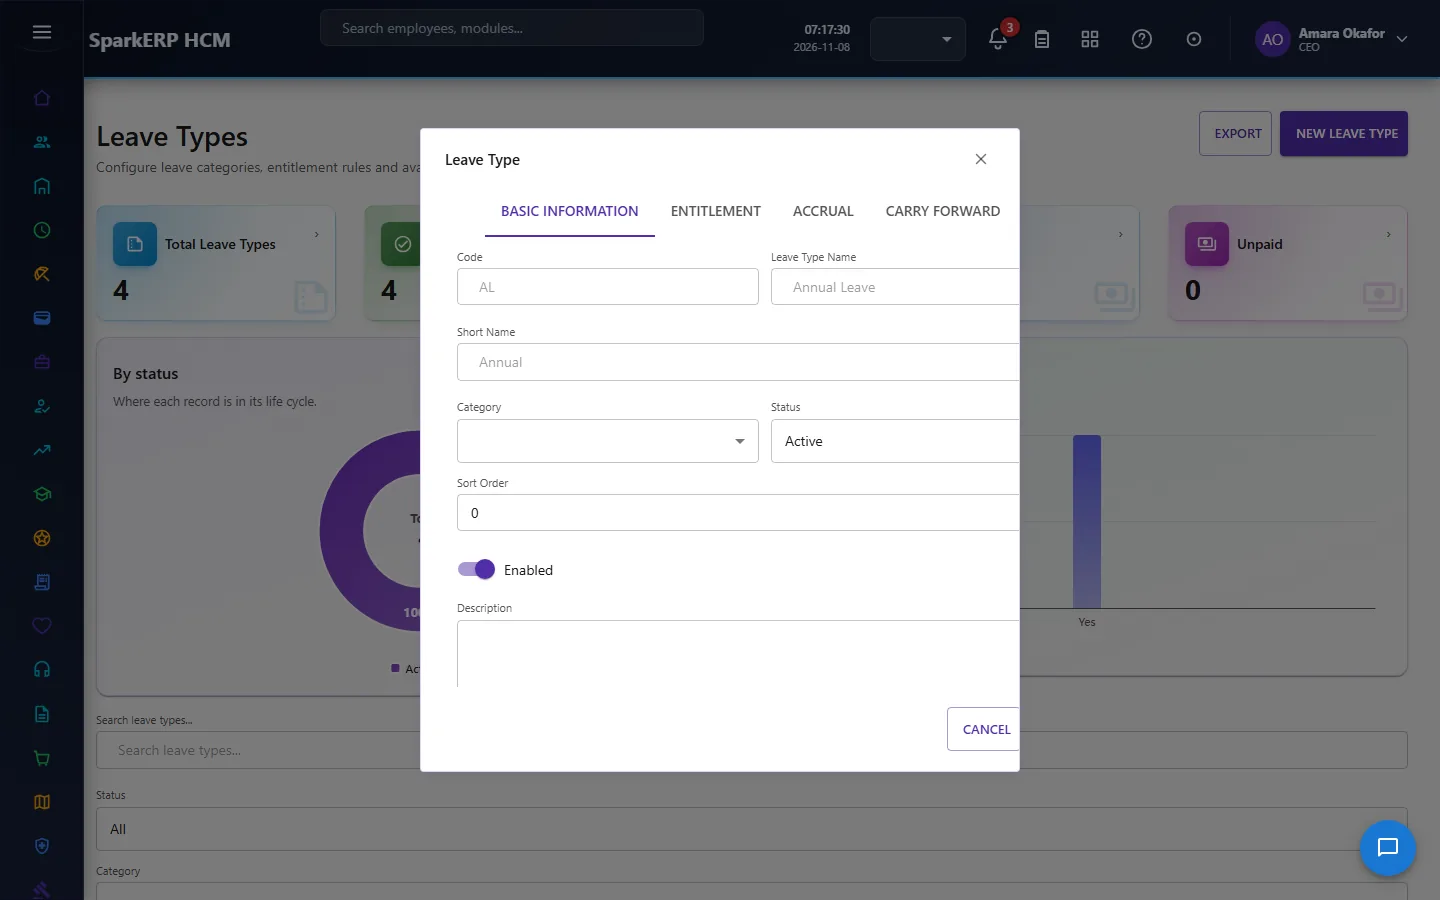
| Field | What to enter |
|---|---|
| Code | Type it (for example: AL). |
| Leave Type Name | Type it (for example: Annual Leave). |
| Short Name | Type it (for example: Annual). |
| Category | Choose from the list. |
| Status | Choose one: Active, Inactive |
| Sort Order | Type it. |
| Description | Type it. |
| Entitlement Type | Choose one: Fixed, Accrued, Unlimited, No Entitlement, Policy Based, Service Based, Grade Based |
| Annual Entitlement (Days) | Type it. |
| Maximum Entitlement (Days) | Type it. |
| Accrual Method | Choose one: None, Annual, Monthly, Quarterly, Biweekly, Per Pay Period, Daily, Custom |
| Accrual Amount | Type it. |
| Start After (Days) | Type it. |
| Maximum Accrual Balance | Type it. |
| Carry Forward Rule | Choose one: No Carry Forward, Unlimited, Fixed Days, Percentage, Policy Based |
| Maximum Carry Forward (Days) | Type it. |
| Carry Forward Expiry | Type it (for example: 31-MAR). |
| Maximum Encashment (Days) | Type it. |
| Minimum Balance to Encash | Type it. |
| Employment Types (comma-separated) | Type it (for example: FULL_TIME,PART_TIME). |
| Minimum Service (Days) | Type it. |
| Gender Eligibility | Choose one: All, Male, Female, Other, Custom Rule |
| Minimum Hours | Type it. |
| Required After (Days) | Type it. |
| Document Types (comma-separated) | Type it (for example: MEDICAL_CERTIFICATE). |
| Approval Workflow Id | Type it. |
| Payroll Component | Type it (for example: PAID_LEAVE). |
| Calendar Visibility | Choose one: Team, Manager, Private, Public |
Then select Save. The window closes and the table shows the record.
The table shows: Code, Leave Type, Category, Paid, Status, Sort Order, Actions.
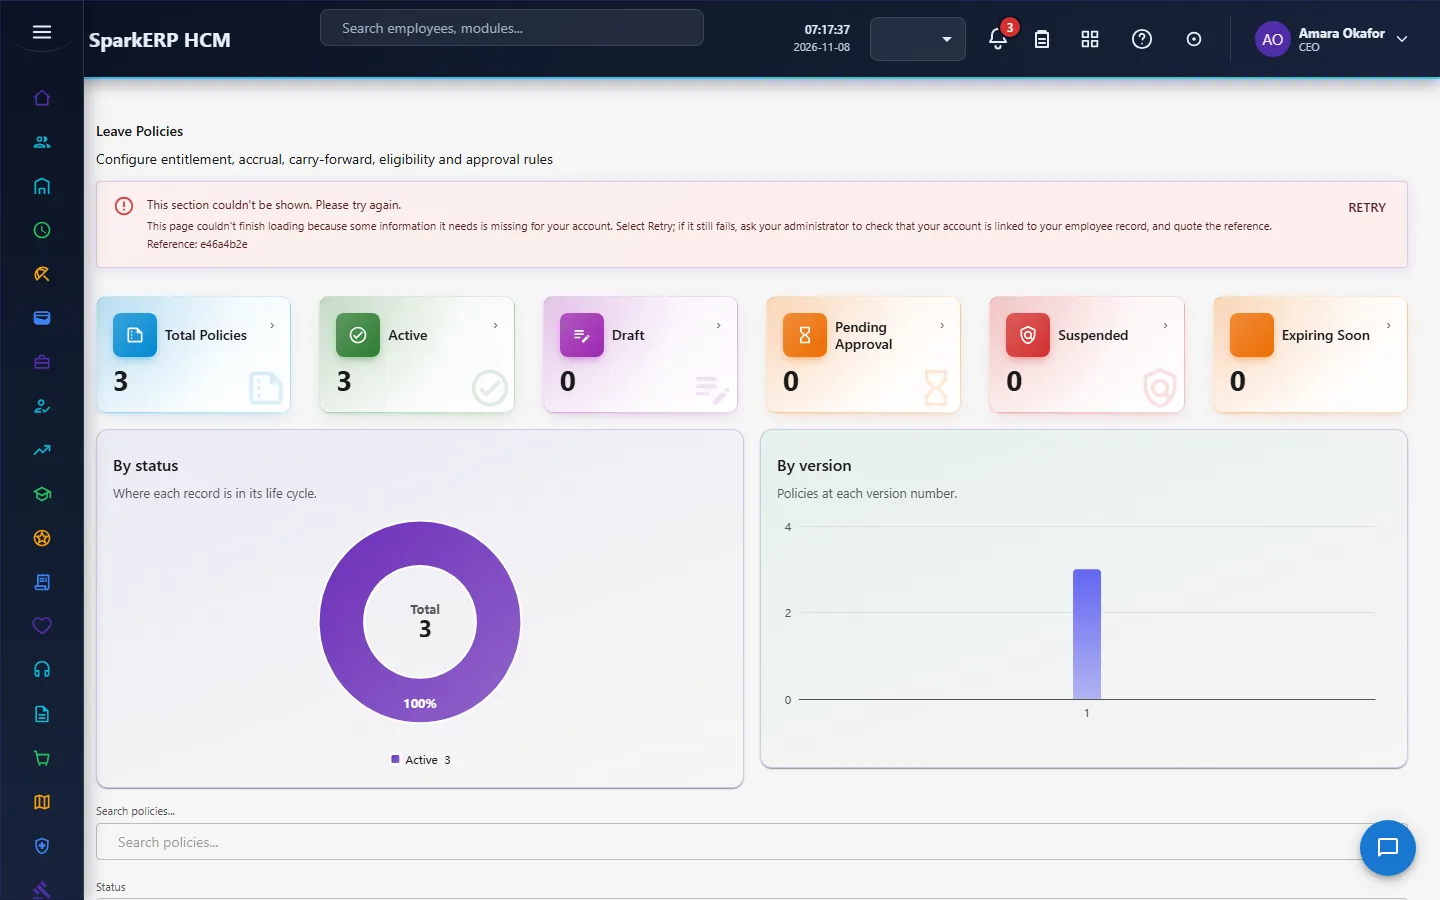
Leave policies
Open Leave Management > Leave Policies.
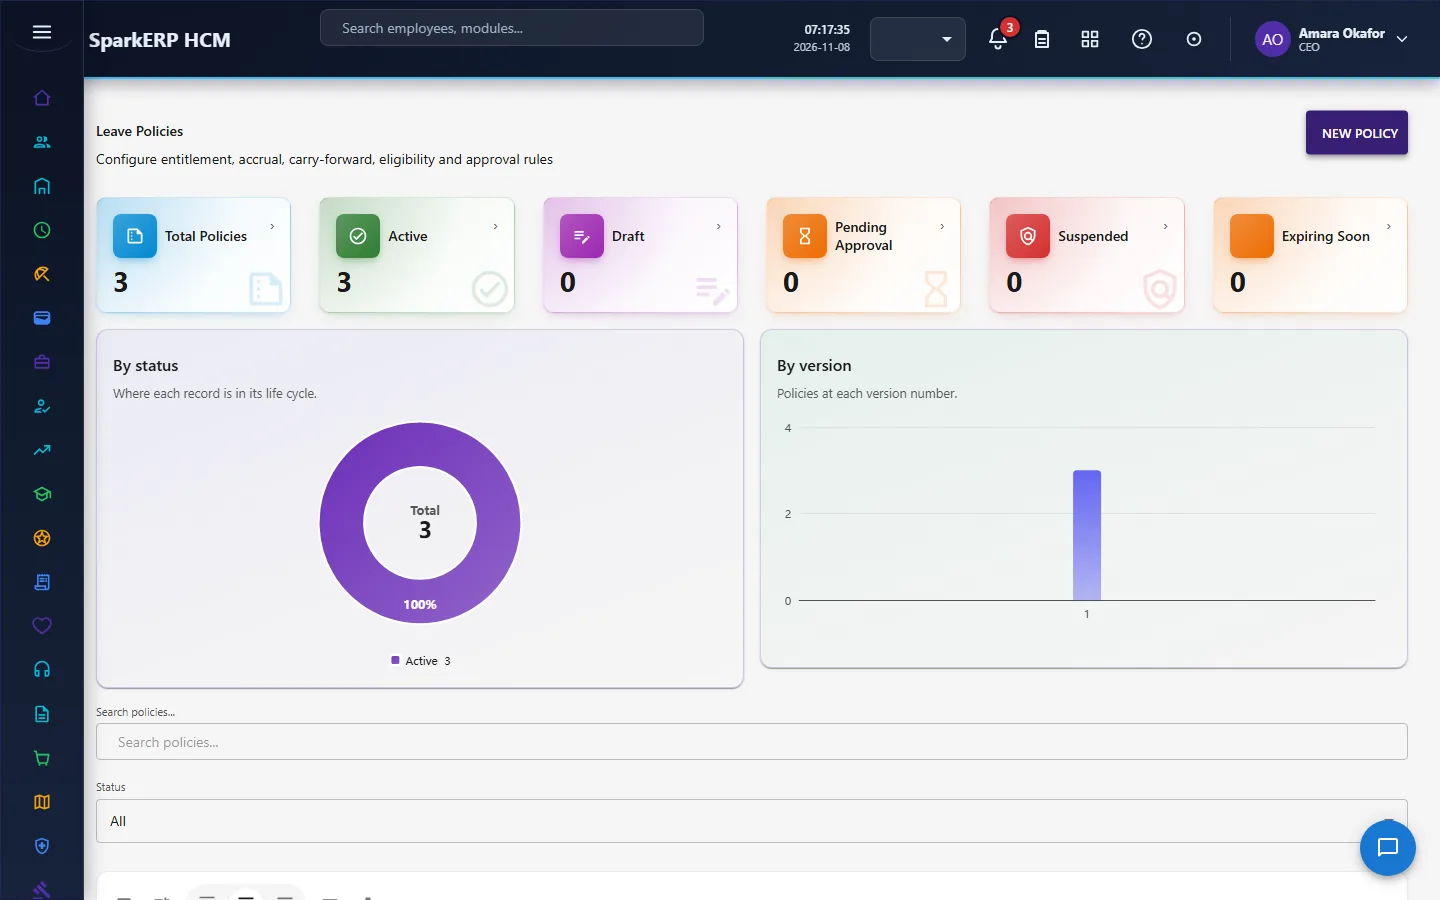
To add a record, select New Policy. In the window Leave Policy fill in (a star after a name means the screen requires it):
| Field | What to enter |
|---|---|
| Policy Name | Type it. |
| Policy Code | Type it. |
| Description | Type it. |
| Organization ID | Type it. |
| Employee Group ID | Type it. |
| Employment Type ID | Type it. |
| Job Grade ID | Type it. |
| Location ID | Type it. |
| Effective From | Type it (for example: YYYY-MM-DD). |
| Effective To | Type it (for example: YYYY-MM-DD). |
| Leave Types (JSON) | Type it. |
| Accrual Enabled | Tick or untick. |
| Accrual Frequency | Choose one: Yearly, Monthly, Quarterly, Bi-Monthly, Joining Date, Custom |
| Annual Entitlement | Type it. |
| Carry Forward Enabled | Tick or untick. |
| Maximum Carry Forward Days | Type it. |
| Carry Forward Expiry Enabled | Tick or untick. |
| Expiry After (Months) | Type it. |
| Encashment Enabled | Tick or untick. |
| Minimum Balance for Encashment | Type it. |
| Maximum Encashment Days | Type it. |
| Minimum Service (Days) | Type it. |
| Probation Employees Eligible | Tick or untick. |
| Minimum Duration (Days) | Type it. |
| Maximum Consecutive Days | Type it. |
| Half-Day Allowed | Tick or untick. |
| Weekend Rule | Choose one: Exclude, Include, Configurable |
| Sandwich Rule | Tick or untick. |
| Allow Negative Balance | Tick or untick. |
Then select Save Draft. The window closes and the table shows the record.
The table shows: Policy Name, Policy Code, Organization, Effective From, Effective To, Version, Status, Actions.
Data Import (load leave types and other reference data from a file)
Open Administration > Data Import.
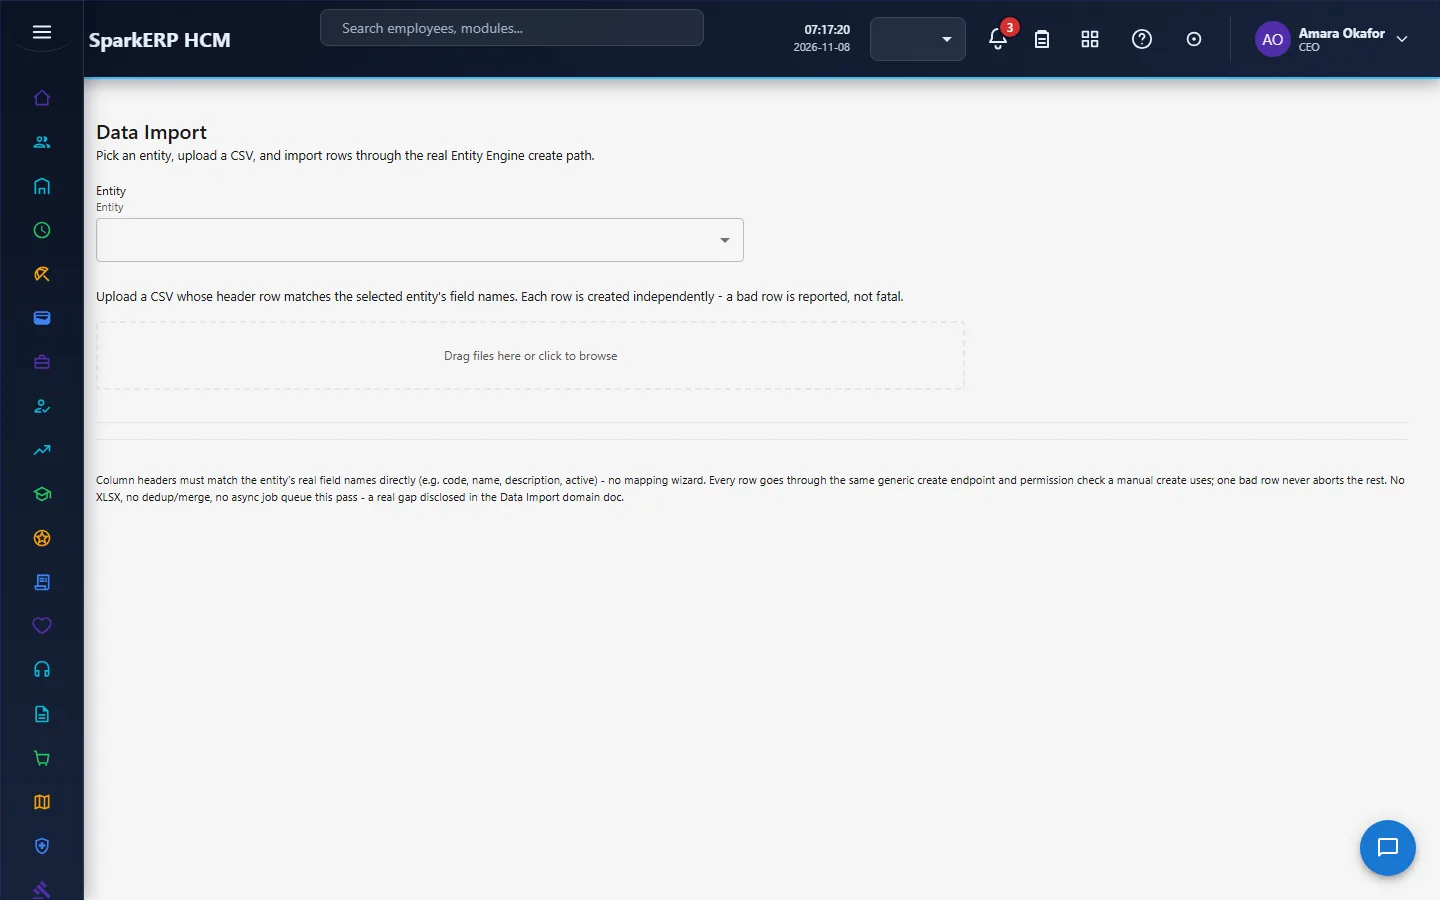
This page is one form. Fill in or change:
| Field | What to enter |
|---|---|
| Entity | Choose one: Leave Type Category, Leave Type, Organization Tag, Permission Catalog, Compensation market rates |
Then select Save.
Chapter 10. The modules you use
Set these up next, in this order. Each guide has the same step-by-step layout as this one.
| Module | Start here | What you set up first |
|---|---|---|
| Leave | Leave setup | Leave types and policies (done above), then holidays, then each person's balance. |
| Time and attendance | Attendance policies | Shifts, attendance policy, then devices or the mobile punch. |
| Payroll | Payroll setup | Pay groups, salary components and structures, then each person's compensation. |
| Recruitment | Recruitment | A requisition template and the approval route. |
| Onboarding | New hire onboarding | A checklist template for new joiners. |
| Performance, Learning, Benefits, Expenses, Travel | HCM user guide | Each module guide starts with its own setup chapter. |
Chapter 11. Go live
Before you tell people to sign in:
- Sign in as an ordinary user with a role you created, not as the owner, and open Core HR, Leave and My Payslips: the launcher, menus and pages should show only what that person may use.
- Check the header on that account: the name and job title come from the employee record. If they are missing, the account is not linked to an employee.
- In Administration > HCM Users, make sure everyone who needs access has an account and the right role.
- Check Application Access in the launcher settings: by default everyone may open every licensed application. Deny it only for people who must not use HCM.
- Tell people their sign-in name and how to reset a password (Forgot password on the sign-in page).
- Keep the Tenant Owner credentials with two people, not one.
Related
- Setting up HCM for your organization: the same journey in outline.
- HCM Users
- Permissions catalog